
1. Identifying Common Bulb Pests
When your bulbs aren’t blooming or seem unhealthy, pests might be the culprit. Some of the most common pests that affect flower bulbs in American gardens include bulb mites, aphids, and rodents. Recognizing these pests early can help you take action before they cause serious damage.
Bulb Mites
Bulb mites are tiny, white or translucent pests that feed on decaying plant material but can also attack healthy bulbs, especially if the bulb is already weakened. They are often found in stored bulbs or in soil that stays too moist.
Signs of Infestation:
- Soft, mushy spots on bulbs
- Slow or stunted growth
- Presence of fine dust or webbing around the bulb base
Prevention and Control Tips:
- Store bulbs in a cool, dry place with good ventilation
- Avoid planting in overly wet or compacted soil
- If infestation is severe, discard affected bulbs and sterilize tools and containers
Aphids
Aphids are small, soft-bodied insects that suck sap from plants. They usually gather in clusters on new growth and flower stems. While they don’t usually attack the bulb itself, their feeding can weaken the plant and attract other problems like mold.
Signs of Infestation:
- Curling or yellowing leaves
- Sticky residue (honeydew) on leaves or nearby surfaces
- Presence of ants attracted to the honeydew
Prevention and Control Tips:
- Spray plants with water to dislodge aphids
- Introduce beneficial insects like ladybugs into your garden
- Use insecticidal soap for severe infestations
Rodents (Mice, Voles, Squirrels)
Rodents love to dig up and eat flower bulbs, especially tulips and crocuses. If you find missing bulbs or unexplained holes in your garden beds, rodents might be to blame.
| Rodent Type | Signs of Damage | Control Methods |
|---|---|---|
| Mice/Voles | Tunnels near bulb beds, missing bulbs, chewed roots | Use hardware cloth barriers under soil; trap if necessary |
| Squirrels | Dug-up soil, partially eaten bulbs left behind | Use bulb cages; cover freshly planted areas with mesh until established |
By staying alert to these common pests and taking simple preventative measures, you can protect your flower bulbs and enjoy healthy blooms throughout the season.
2. Recognizing and Treating Bulb Diseases
Bulbs are a favorite among gardeners for their vibrant blooms and low-maintenance nature, but they can still fall victim to various diseases. Knowing how to spot and treat common bulb diseases early can make a big difference in the health of your plants. Two of the most common culprits are fungal and bacterial infections, such as gray mold and basal rot.
Common Bulb Diseases
The table below highlights some typical diseases that affect bulbs, their symptoms, causes, and recommended treatments:
| Disease | Symptoms | Cause | Treatment |
|---|---|---|---|
| Gray Mold (Botrytis) | Soft, mushy spots on bulbs; gray fuzzy mold on leaves or flowers | Fungal infection due to high humidity or poor air circulation | Remove infected parts, improve airflow, use fungicide if needed |
| Basal Rot | Yellowing leaves, mushy or rotting bulb base with foul odor | Bacterial or fungal pathogens in overly wet soil conditions | Discard affected bulbs, avoid overwatering, plant in well-drained soil |
| Narcissus Smoulder | Browning leaf tips, distorted growth, black sclerotia on bulbs | Fungal disease affecting daffodils and related bulbs | Destroy infected plants, avoid overhead watering, rotate crops yearly |
Preventing Bulb Diseases
A few simple practices can go a long way in preventing disease outbreaks:
- Select healthy bulbs: Choose firm, mold-free bulbs with no soft spots.
- Avoid overwatering: Keep soil moist but not soggy. Good drainage is key.
- Sterilize tools: Clean garden tools regularly to prevent spreading pathogens.
- Adequate spacing: Allow enough room between bulbs for air circulation.
Treating Infected Bulbs
If you notice signs of disease:
- Remove affected plants immediately: This helps stop the spread of infection to healthy bulbs.
- Treat with fungicides or bactericides: Use products labeled safe for bulbs and follow instructions carefully.
- Avoid replanting in the same spot right away: Give the area time to recover by rotating planting locations each year.
A Note on Storage
If you store bulbs over winter, make sure theyre completely dry before packing them away. Use breathable containers like mesh bags or paper-lined boxes, and keep them in a cool, dry place to discourage fungal growth.
3. Dealing with Poor or No Blooming
It can be frustrating when your bulbs come up green but fail to produce flowers, or when they don’t emerge at all. Poor or no blooming is a common issue for gardeners and usually points to a few key problems that are easy to fix once identified. Lets break down the most common causes and how you can get your bulbs blooming beautifully again.
Improper Planting Depth
If bulbs are planted too shallow or too deep, they may struggle to bloom properly. Each type of bulb has a preferred planting depth, usually based on its size. A good rule of thumb is to plant the bulb two to three times as deep as the bulb is tall.
Recommended Planting Depths
| Bulb Type | Planting Depth |
|---|---|
| Tulips | 6–8 inches |
| Daffodils | 6–8 inches |
| Crocus | 3–4 inches |
| Hyacinths | 4–6 inches |
Insufficient Chilling Hours
Most spring-blooming bulbs—like tulips, daffodils, and hyacinths—require a period of cold dormancy in order to trigger blooming. In warmer U.S. climates (USDA Zones 8–10), bulbs may not get enough chilling hours naturally. If you’re in these zones, consider pre-chilling your bulbs in the refrigerator for 10–14 weeks before planting.
Signs of Chilling Problems:
- No blooms or very weak blooms in spring.
- Bushy green leaves with no flower stalks.
Nutrient Deficiencies
Bulbs need balanced nutrients to store energy for blooming. If your soil lacks phosphorus—key for flower production—you may see lots of leaves but no flowers. Applying a balanced fertilizer labeled for bulbs (like 10-10-10) or one higher in phosphorus (like 5-10-5) in early fall and again after blooming can help.
Tips for Fertilizing Bulbs:
- Avoid high-nitrogen fertilizers, which promote leaf growth over blooms.
- Add compost or bone meal at planting time for long-term nutrition.
- Fertilize again after flowering to help bulbs store energy for next year.
Crowding or Aging Bulbs
If your bulbs have been in the ground for several years and blooming has decreased, they may be overcrowded or aging out. Overcrowded bulbs compete for nutrients and space, which reduces their ability to bloom. Dig them up in late summer or early fall, divide them, and replant with proper spacing.
General Spacing Guidelines:
| Bulb Type | Recommended Spacing |
|---|---|
| Daffodils | 4–6 inches apart |
| Tulips | 4–5 inches apart |
| Crocus | 2–3 inches apart |
Poor blooming doesnt mean your gardening efforts were wasted—it just means some adjustments are needed. With the right care and attention, your bulbs will reward you with vibrant blooms season after season.
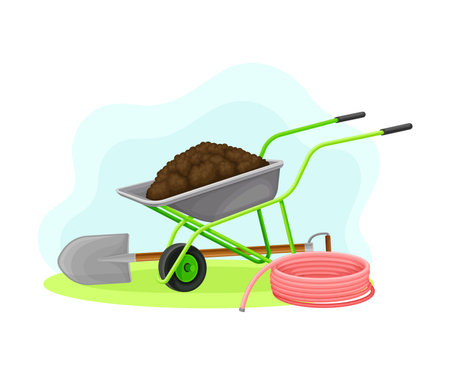
4. Best Practices for Bulb Care and Maintenance
To avoid common problems like pests, diseases, and poor blooming in your bulbs, it’s important to follow seasonal care routines. With the right care at each stage of the year, you can keep your bulbs healthy and ensure they bloom beautifully season after season.
Planting Guidelines by Season
Different bulbs have different planting times. Here’s a quick guide to help you know when and how to plant:
| Bulb Type | Best Planting Time | Soil Tips |
|---|---|---|
| Spring-Flowering Bulbs (e.g., tulips, daffodils) | Fall (6-8 weeks before first frost) | Well-drained, slightly acidic to neutral soil |
| Summer-Flowering Bulbs (e.g., lilies, dahlias) | Spring (after last frost) | Rich, well-draining soil with compost |
Watering Tips
Watering is essential but must be done properly to prevent rot and disease. Overwatering is one of the most common causes of bulb failure.
- After planting: Water thoroughly once to settle the soil.
- During growth: Keep soil moist but not soggy. Water deeply once a week if there’s no rain.
- Dormant periods: Reduce or stop watering when foliage dies back (especially for spring bulbs in summer).
Post-Bloom Care
Caring for bulbs after they bloom is just as important as planting them correctly.
- Allow leaves to die back naturally—this helps store energy for next year’s blooms.
- Avoid cutting green foliage; wait until its yellow or brown.
- If you live in an area with wet summers, dig up bulbs like tulips or gladiolus and store them in a dry place until fall.
Storage Tips for Dug-Up Bulbs
| Bulb Type | Drying Period | Storage Conditions |
|---|---|---|
| Tulips | 1 week in shade | Cool, dry place around 50°F (10°C) |
| Dahlias | Few days in shade | Packed in peat moss or sawdust in a breathable container |
Bonus Tip:
Add mulch over planted areas during winter to protect bulbs from freeze-thaw cycles. Just remember to remove heavy mulch in early spring so new shoots can emerge easily.
5. When and How to Replace or Replant Bulbs
Even the healthiest bulbs won’t last forever. Over time, they may stop producing strong blooms or show signs of decline due to age, overcrowding, or disease. Knowing when to replace or divide your bulbs is key to keeping your garden vibrant season after season.
Signs Your Bulbs Need Replacing
Sometimes it’s obvious that a bulb is past its prime, but other times the signs are more subtle. Here are some common indicators:
| Symptom | Possible Cause | Action |
|---|---|---|
| No blooms after several seasons | Bulb exhaustion or age | Replace with new bulbs |
| Smaller flowers than usual | Crowded bulbs or declining health | Dig up and divide; replant healthiest ones |
| Soft, mushy bulbs when dug up | Disease or rot | Discard immediately and avoid replanting in same spot for a year |
| Weak or spindly foliage | Nutrient depletion or poor location | Replant in better soil; consider fertilizer use |
When to Dig Up Bulbs
The right time to dig up bulbs depends on their type:
- Spring-blooming bulbs (like tulips and daffodils): Wait until the foliage has yellowed and died back naturally—usually late spring to early summer.
- Summer-blooming bulbs (like lilies and gladiolus): Lift in fall after frost has killed the top growth.
How to Divide and Replant Bulbs
If your bulbs are overcrowded but otherwise healthy, dividing them can restore blooming performance. Follow these simple steps:
Step-by-Step Guide:
- Gently dig around the bulb clump: Use a garden fork or spade to avoid damaging them.
- Separate individual bulbs: Look for firm, unblemished bulbs. Discard any that are soft, moldy, or cracked.
- Replant promptly: Choose a sunny location with well-drained soil. Plant at the recommended depth for each bulb type (generally two to three times the bulb’s height).
- Add compost or balanced fertilizer: This gives bulbs a fresh start and encourages strong root development.
- Water well: Especially important after planting to help settle the soil around the roots.
A Quick Reference by Bulb Type
| Bulb Type | Lifespan (Years) | Best Time to Replace/Divide |
|---|---|---|
| Tulips | 1–5 (many varieties decline quickly) | Every 1–2 years if blooms fade |
| Daffodils | 5–10+ | Every 3–5 years if clumps get crowded |
| Crocus | 5–8 | Every 4–6 years as needed |
| Lilies (not true bulbs but often treated similarly) | Many years with care | If flower size declines or stems weaken |
A little attention each season goes a long way in keeping your bulb displays colorful and thriving. By recognizing when its time to refresh your plantings, you’ll ensure lasting beauty throughout your landscape year after year.