1. Assess Your Garden Space
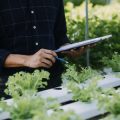
Before you get your hands dirty with spring planting, it’s crucial to take a good look at your garden space. Start by checking the condition of your garden beds. Remove any weeds, dead plants, or leftover debris from last season—these can harbor pests and diseases that may affect your new crops. Next, clean up fallen leaves, sticks, and any other clutter that might have gathered over the winter months. This not only makes your garden look tidy but also helps prevent unwanted critters from setting up shop. Finally, review your overall garden layout. Take note of sunlight patterns, drainage issues, and the space available for each type of plant you want to grow. Drawing out a quick sketch or using a garden planner app can help you visualize where everything should go. By giving your garden area a thorough assessment now, you’ll set yourself up for a smooth and successful planting season.
2. Prepare Your Soil
Before you even think about planting, taking the time to prepare your soil can make all the difference for a productive spring garden. Start by testing your soil—knowing your soil’s pH and nutrient levels helps you avoid guesswork later on. Local county extension offices or at-home soil test kits are both practical options for American gardeners.
Test Your Soil
Testing your soil lets you know if it’s too acidic, too alkaline, or just right for the crops you want to grow. Most vegetables prefer a slightly acidic to neutral pH (6.0-7.0), while some fruits and ornamentals have special requirements. If your test shows deficiencies, you’ll know exactly what amendments to add rather than over-fertilizing or wasting money on unneeded products.
Add Organic Amendments
Once you have your test results, improve your soil structure and fertility with organic amendments. In the U.S., compost, well-rotted manure, leaf mold, and peat moss are common choices. These amendments not only add nutrients but also help retain moisture and encourage beneficial microbes in your garden beds.
Common Organic Amendments & Their Benefits
| Amendment | Main Benefit |
|---|---|
| Compost | Improves soil texture & adds balanced nutrients |
| Manure (aged) | Boosts nitrogen for leafy growth |
| Leaf Mold | Enhances water retention & microbial life |
| Peat Moss | Lightens heavy soils & aids moisture management |
Turn Over the Beds
No-till is growing in popularity, but most traditional home gardens benefit from turning over the beds each spring. Use a garden fork or broadfork to gently loosen the soil 8–12 inches deep. This breaks up compaction left from winter weather and makes it easier for roots to reach nutrients and water once planting begins.
A healthy start now means fewer problems down the road—and sets the stage for strong, resilient plants all season long.
3. Review Tools and Supplies
Before you get your hands dirty in the garden, take a moment to go over your tools and supplies. Early spring is the best time to inspect all your gardening tools—think shovels, pruners, trowels, and rakes—for signs of rust or damage. Sharpen blades, tighten loose screws, and oil wooden handles to make sure everything is in good working order. There’s nothing worse than reaching for your favorite tool only to find it broken or dull just when you need it most.
Once your tools are ready, check your supply stash. Go through your leftover seeds from last year and toss any that are past their prime. Restock on essentials like seed packets, starter trays, potting mix, and fertilizer now so you’re not making last-minute trips to the garden center on planting day. Don’t forget items like plant markers, gloves, watering cans, and mulch. Taking inventory early helps you avoid unnecessary stress and keeps you focused on what matters—growing a healthy, productive spring garden.
Plan and Start Seeds Indoors
Getting a jump start on your spring garden often means starting some crops indoors. This allows you to grow healthy seedlings that will be ready to transplant after the last frost, giving you a head start on the growing season. First, check the average last frost date for your area—this is key to knowing when to plant seeds inside. Next, decide which crops benefit from early indoor sowing. Typically, tomatoes, peppers, eggplants, and many herbs perform best when started indoors, while root vegetables like carrots and beets do better sown directly outside.
Choosing What to Start Indoors
| Crop | Start Indoors? | Weeks Before Last Frost |
|---|---|---|
| Tomatoes | Yes | 6-8 |
| Peppers | Yes | 8-10 |
| Lettuce | Optional | 4-6 |
| Cucumbers | Optional | 3-4 |
| Carrots | No (Direct Sow) | N/A |
Setting Up Your Indoor Seed Area
A successful indoor seed setup doesn’t have to be fancy. You’ll need seed trays or small pots, high-quality seed-starting mix, and a reliable light source. While a sunny windowsill can work in a pinch, most gardeners find that using grow lights ensures strong, stocky seedlings rather than leggy, weak ones. Set your trays on waterproof trays or old baking sheets to catch excess water and keep things tidy.
Tips for Indoor Seed Starting:
- Label everything—seedlings can look very similar at first!
- Keep soil consistently moist but not soggy.
- If using grow lights, position them 2-4 inches above seedlings and adjust as plants grow.
- Use a fan on low nearby to promote sturdy stems and prevent fungal issues.
- Reference your USDA hardiness zone and local extension service for crop-specific timing.
Your Local Frost Dates Matter
The timing of seed starting is closely tied to your region’s climate. Consult the USDA Plant Hardiness Zone Map or your local county extension office for accurate frost dates. By aligning your indoor seed schedule with these dates, you’ll avoid setting plants out too soon—or too late—and maximize your garden’s productivity this spring.
5. Address Pests and Weeds Early
Before you get swept up in the excitement of spring planting, take some time to scout your garden for any lingering winter weeds or overwintering pests. These sneaky problems can quickly escalate once the weather warms up, making it much tougher to manage them later in the season. Walk through your garden beds and borders, looking closely for unwanted plants and signs of insect activity. Pull out any weeds you spot by the roots—they’re easier to remove while the soil is still moist from winter rains.
If you notice signs of pests like aphid clusters, slugs hiding under debris, or chewed leaves on perennial plants, address these issues now using eco-friendly methods. Consider laying down a layer of mulch to suppress weed growth and help retain moisture as temperatures rise. For pest management, try introducing beneficial insects such as ladybugs or lacewings, or use homemade sprays like neem oil if needed. Staying ahead of these challenges will save you time and headaches once your vegetable transplants and flower seedlings go in the ground. A little effort now ensures your spring garden gets off to a healthy, thriving start.
6. Check Irrigation and Watering Systems
Before you get swept up in the excitement of spring planting, make sure your irrigation setup is ready to roll. Whether you rely on hoses, drip irrigation, or sprinklers, a thorough test now can save you headaches—and thirsty plants—later in the season. Start by uncoiling your hoses and checking for leaks, cracks, or worn-out washers that could waste water or reduce pressure. If you use drip systems, clear any clogged emitters and flush the lines to prevent blockages. For sprinkler systems, run a full cycle and watch for uneven coverage or malfunctioning heads; adjust as needed to make sure every inch of your garden gets the hydration it needs. It’s also smart to check timers or controllers so your watering schedule is set before those warmer days hit. A well-maintained watering system not only conserves water but also ensures your new plants will get off to a healthy, vigorous start—no scrambling for repairs when the growing season is already underway.