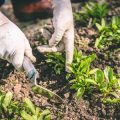
Understanding Your Soil Type
Before you start planting, its important to understand what kind of soil youre working with. Different soil types affect how well water drains, how roots grow, and how nutrients are held in the ground. By identifying your soil type—clay, sandy, loamy, or silty—you’ll be better prepared to improve it and help your garden thrive.
Common Soil Types
Here’s a quick overview of the four main types of soil found in home gardens across the U.S.:
| Soil Type | Texture | Drainage | Nutrient Holding | Common Issues |
|---|---|---|---|---|
| Clay | Sticky and heavy when wet; hard when dry | Poor drainage | Holds nutrients well | Compacts easily; slow to warm in spring |
| Sandy | Gritty and loose | Excellent drainage | Poor nutrient retention | Dries out quickly; needs frequent watering and fertilizing |
| Loamy | Soft, crumbly, balanced mix | Good drainage and moisture retention | High fertility | Often considered ideal for most plants |
| Silty | Smooth and slippery when wet; powdery when dry | Moderate drainage | Holds nutrients well | Can become compacted easily without organic matter |
Simple Ways to Test Your Soil Type at Home
The Squeeze Test
Dampen a handful of soil and squeeze it in your hand:
- If it holds its shape but crumbles easily when poked—its likely loam.
- If it stays in a tight ball and feels sticky—its probably clay.
- If it falls apart immediately—youre dealing with sandy soil.
- If its smooth and holds together but feels slick—its silty.
The Jar Test (Soil Sediment Test)
- Fill a clear jar halfway with soil from your garden.
- Add water until nearly full, then shake vigorously.
- Let it sit undisturbed for 24 hours.
- You’ll see layers form: sand settles first, then silt, then clay on top.
This test gives you a visual breakdown of your soil components and helps you estimate the balance between them.
Why Soil Type Matters for Gardening Success
Your soil type affects everything from root development to water usage. For example, clay soils can drown plants if not amended properly, while sandy soils may require more frequent watering. Knowing your starting point lets you make informed decisions about improving your gardens health and productivity.
Next Up: Testing Your Soil’s pH and Nutrients
Now that youve identified your soil type, the next step is learning how to test its pH level and nutrient content. This will give you a fuller picture of what your garden needs to grow strong and healthy plants.
2. How to Test Your Garden Soil
Before planting anything, it’s important to know what kind of soil you’re working with. Testing your garden soil helps you understand its pH level, nutrient content, and overall health—so you can make the right improvements. Whether youre a beginner or a seasoned gardener, there are simple ways to test your soil using DIY methods or reliable kits available in garden centers or online.
DIY Soil Testing Methods
You don’t always need fancy tools to get an idea of your soil’s condition. Here are a few easy tests you can try at home:
1. The Squeeze Test
This helps determine your soil texture—whether its sandy, loamy, or clay-heavy.
- Scoop up a handful of slightly damp soil.
- Squeeze it in your hand and then open your palm.
| Soil Reaction | What It Means |
|---|---|
| Crumbles easily | Loamy and ideal for most plants |
| Stays in a tight ball | Clay-heavy and may need amendments |
| Falls apart quickly | Sandy and might drain too fast |
2. The Vinegar and Baking Soda Test
This quick experiment helps estimate your soils pH level.
- Add a scoop of moist soil into two separate containers.
- Pour vinegar into one container. If it fizzes, your soil is alkaline.
- Add water and baking soda to the second container. If it fizzes, your soil is acidic.
- No reaction? Your pH is likely neutral (which is usually good).
Using Soil Test Kits
If you want more accurate results, especially about nutrients like nitrogen (N), phosphorus (P), and potassium (K), consider using a store-bought test kit. These are affordable, easy to use, and give quick feedback on multiple aspects of soil health.
Popular At-Home Soil Test Kits Include:
- Luster Leaf Rapitest: Offers color-coded vials for testing pH and key nutrients.
- Meters and Digital Testers: Some models check moisture levels, light exposure, and pH all in one tool.
- Lab Mail-In Tests: For the most detailed analysis, some companies allow you to send in samples for professional testing with customized recommendations.
Tip:
For best results, take samples from different areas of your garden (about 6 inches deep) and mix them together before testing. This gives you a more accurate picture of your overall soil quality.
A little testing goes a long way in helping your garden thrive. Once you know what your soil needs—or doesn’t need—you’ll be better equipped to prepare it for healthy plant growth.
3. Essential Tools and Materials for Soil Prep
Before you can grow healthy plants, its important to make sure your soil is ready to support them. That means having the right tools on hand and using materials that improve your soil’s structure, drainage, and nutrient content. Heres a breakdown of the essential items youll need for effective soil preparation.
Must-Have Garden Tools
These basic tools will help you loosen, mix, and prepare your garden soil with ease:
| Tool | Purpose |
|---|---|
| Garden Fork | Breaks up compacted soil and mixes in amendments. |
| Shovel or Spade | Digs deep into the soil for turning and lifting. |
| Rake | Levels the surface and removes rocks or debris. |
| Wheelbarrow | Transports compost, mulch, or soil from one area to another. |
| Gloves | Keeps your hands protected while working in the dirt. |
Soil Amendments to Improve Quality
The right organic materials can make a big difference in how well your garden grows. Here are common soil amendments used by home gardeners across the U.S.:
| Amendment | Description | Main Benefits |
|---|---|---|
| Compost | Decomposed organic material made from kitchen scraps, leaves, and yard waste. | Adds nutrients, improves texture, and supports beneficial microbes. |
| Mulch | A protective layer of material (like wood chips or straw) placed on top of the soil. | Retains moisture, suppresses weeds, and regulates soil temperature. |
| Organic Matter | Includes compost, aged manure, leaf mold, and peat moss. | Improves aeration, water retention, and overall fertility. |
| Lime or Sulfur | Naturally occurring minerals used to adjust pH levels in the soil. | Lime raises pH (less acidic), sulfur lowers it (more acidic). |
Tip:
If youre unsure what your soil needs, start with a simple at-home test kit or send a sample to your local extension office for analysis. This will tell you which amendments will be most helpful based on your soils current condition.
Additional Helpful Supplies
- Tarp: Great for mixing large amounts of compost or spreading out soil without making a mess.
- Soil Thermometer: Helps determine when the ground is warm enough for planting certain crops.
- Irrigation Tools: Soaker hoses or drip systems keep moisture consistent during prep and planting phases.
Having these tools and materials ready before you begin prepping your garden will save time and ensure that your plants get off to a strong start.
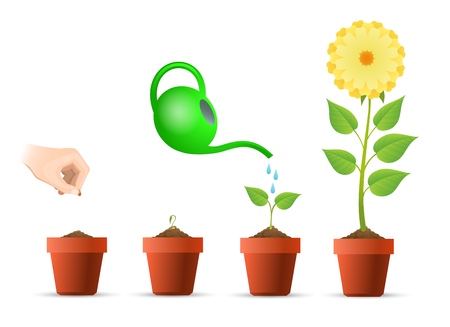
4. Steps to Prepare Your Soil for Planting
Getting your soil ready before planting is one of the most important things you can do to ensure a healthy, productive garden. Whether youre growing vegetables, flowers, or herbs, following a step-by-step guide will help you create the best possible environment for your plants. Heres how to clear, till, and enrich your soil the right way.
Step 1: Clear the Area
Start by removing any weeds, grass, rocks, and debris from your garden bed. You can use a hoe, shovel, or even a weed puller for stubborn roots. If youre starting a new garden area with thick sod, consider using a sod cutter or layering cardboard over the grass for a few weeks to kill it naturally.
Step 2: Test Your Soil
Before you add anything to the soil, its essential to know what youre working with. Use an at-home soil test kit or send a sample to your local extension service. These tests will tell you about:
- Soil pH (acidic, neutral, or alkaline)
- Nutrient levels (nitrogen, phosphorus, potassium)
- Soil texture (clay, loam, sand)
Step 3: Till or Loosen the Soil
Once cleared and tested, its time to loosen the soil so roots can grow easily. Use a garden fork or rototiller to work the soil 8–12 inches deep. If your soil is compacted or mostly clay, this step is especially important.
Step 4: Add Organic Matter
Mix in organic materials like compost, aged manure, or leaf mold to improve soil texture and fertility. This helps with water retention and drainage while feeding beneficial microbes.
Common Organic Amendments
| Amendment | Benefits | Best For |
|---|---|---|
| Compost | Adds nutrients and improves structure | All soil types |
| Aged Manure | Rich in nitrogen; boosts microbial life | Poor or sandy soils |
| Peat Moss | Improves moisture retention | Sandy soils |
| Lime or Sulfur | Adjusts pH levels | Acidic or alkaline soils |
Step 5: Rake and Level the Surface
After enriching your soil, rake the surface smooth and level. This helps seeds distribute evenly and ensures uniform watering across your garden bed.
Step 6: Let It Settle (Optional)
If youre preparing your garden ahead of planting season, let the amended soil sit for a week or two before planting. This gives time for organic matter to break down and integrate naturally into the native soil.
Tip:
If youre planting immediately after preparation, make sure not to plant too deeply in freshly tilled loose soil—roots may settle more than expected once watered.
5. How to Improve Soil Health Long-Term
Healthy soil is the foundation of a thriving garden, and taking care of it year after year ensures your plants stay strong and productive. Instead of relying on synthetic fertilizers or quick fixes, try these sustainable practices that build up your soil naturally over time.
Crop Rotation
Rotating crops means changing what you plant in each part of your garden every season. This helps prevent nutrient depletion and reduces the risk of pests and diseases that target specific plant families.
Simple Crop Rotation Example:
| Year | Garden Bed A | Garden Bed B | Garden Bed C |
|---|---|---|---|
| Year 1 | Tomatoes (Fruit) | Lettuce (Leafy) | Carrots (Root) |
| Year 2 | Lettuce (Leafy) | Carrots (Root) | Tomatoes (Fruit) |
| Year 3 | Carrots (Root) | Tomatoes (Fruit) | Lettuce (Leafy) |
This simple rotation keeps nutrients balanced and helps avoid buildup of soil-borne diseases.
Cover Cropping
Cover crops are plants grown primarily to protect and enrich the soil rather than for harvest. They add organic matter, suppress weeds, reduce erosion, and improve water retention.
Popular Cover Crops:
- Clover: Fixes nitrogen into the soil.
- Rye: Great for winter cover, adds biomass.
- Buckwheat: Fast-growing summer cover that attracts pollinators.
Sow cover crops during off-seasons or in between main crops. Before planting your next crop, simply cut them back and work them into the soil as green manure.
Composting
Adding compost to your garden is one of the easiest ways to improve soil structure, fertility, and microbial life. Compost provides a slow-release source of nutrients and helps sandy soils retain moisture while loosening up clay-heavy soils.
What You Can Compost:
| Greens (Nitrogen-rich) | Browns (Carbon-rich) |
|---|---|
| Vegetable scraps | Dried leaves |
| Coffee grounds | Shredded newspaper |
| Grass clippings | Sawdust (untreated wood) |
A good compost pile needs a balance of greens and browns, moisture, and regular turning for proper aeration. Over time, you’ll end up with rich, crumbly compost ready to mix into your garden beds.
Add Organic Matter Regularly
Apart from compost, adding aged manure, leaf mold, or mulch can continuously feed the soil ecosystem. These materials break down slowly and encourage beneficial organisms like earthworms and microbes to thrive.
Tips for Adding Organic Matter:
- Add 1-2 inches of compost or mulch to your beds each season.
- Avoid using fresh manure; let it age first to prevent burning plants.
- Leave grass clippings on the lawn or use them as mulch in veggie beds.
The key to long-term soil health is consistency. With just a few small changes each season—like rotating crops, growing cover plants, and feeding your soil organic matter—youll create a self-sustaining garden that gets better every year.