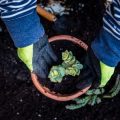
Why Save Seeds from Your Fall Harvest?
Saving seeds from your fall harvest is more than just a thrifty gardening practice—its a cornerstone of homesteading that connects you to the land and your food. For American homesteaders, seed saving plays a critical role in self-sufficiency, allowing you to break free from yearly seed purchases and develop plants perfectly suited to your unique climate and soil. By collecting seeds from your own crops, youre selecting for traits that thrive in your region, whether thats a frost-tolerant kale in the Midwest or drought-resistant beans in the Southwest. This adaptation helps ensure resilient harvests year after year. Additionally, seed saving helps preserve heirloom varieties—tomatoes, beans, squash, and more—that have been passed down through generations on family farms across the U.S. These varieties offer rich flavors and diverse genetics that are often missing from commercial hybrids. As you save and grow these seeds season after season, youre not only sustaining your own pantry but also helping to keep America’s agricultural heritage alive.
2. How to Choose Which Seeds to Save
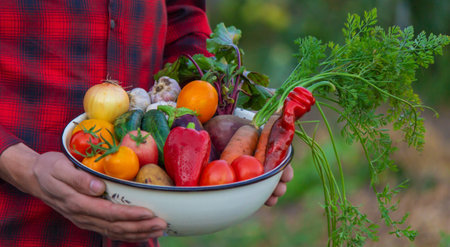
When it comes to saving seeds from your fall harvest, selecting the right plants is crucial for future garden success. Not all seeds are created equal, and choosing seeds from healthy, vigorous plants ensures that next year’s crops will be just as bountiful. Focus on popular American fall staples such as pumpkins, squash, beans, and tomatoes. Here’s how you can identify the best candidates for seed saving:
Evaluate Plant Health
Start by inspecting your plants at the end of the season. Look for those that have shown resistance to disease, pests, and environmental stresses. Plants that thrived without much intervention are likely to pass on these strong traits to their offspring.
Key Characteristics to Consider
| Crop | Desirable Traits for Seed Saving |
|---|---|
| Pumpkins & Squash | Uniform shape, deep color, unblemished skin, high yield |
| Beans | Full pods, vibrant color, good pod formation, no signs of mold or insect damage |
| Tomatoes | Rich flavor, firm texture, consistent size and color, minimal cracking or blemishes |
Avoid Hybrid Varieties
If you’re aiming for consistency in next year’s crop, choose open-pollinated or heirloom varieties rather than hybrids. Hybrids often don’t produce true-to-type offspring, which means you might get surprises that aren’t ideal for your garden goals.
Selecting Individual Fruits or Pods
For each crop type, pick seeds from the most mature fruits or pods. For example, let beans dry fully on the vine before harvesting their seeds; allow tomatoes and squash to ripen completely before extracting seeds. This ensures maximum viability and vigor.
The careful selection of seeds now sets you up for a successful spring planting season. By taking time to choose only the healthiest plants and most robust fruits or pods from your fall harvest, you’re practicing a key homesteader tradition that keeps your garden thriving year after year.

3. Harvesting Seeds: Timing and Techniques
For American homesteaders, knowing when and how to harvest seeds is essential to ensure the next season’s crops thrive. Each vegetable and fruit variety has its own sweet spot for seed collection, so paying attention to timing is key. Generally, you’ll want to allow seeds to mature fully on the plant before harvesting—this often means letting pods dry out or fruits become overripe. For example, beans and peas should be left on the vine until the pods are brown and crisp, while tomatoes need to be picked when deeply colored and slightly soft.
Tools of the Trade
You don’t need fancy gadgets—a pair of sharp garden shears, some clean bowls or trays, and breathable paper bags usually do the trick. For smaller seeds like lettuce or carrots, a fine-mesh sieve can help separate seeds from chaff. Always use clean tools to avoid introducing diseases to your saved seeds.
Harvesting Techniques by Variety
Tomatoes and Peppers:
Scoop out seeds from fully ripe fruits, rinse them thoroughly, and lay them out on a paper towel to dry for several days.
Beans and Peas:
Once pods are dry and rattling on the vine, crack them open over a tray or bowl. Spread seeds in a single layer in a cool, dry place for further drying.
Cucumbers and Squash:
Let fruits overripen on the vine, then cut them open and scoop out seeds. Rinse away any pulp, then dry the seeds completely before storage.
Lettuce and Greens:
Wait until flower stalks form fluffy seed heads. Snip off heads into a bag and shake gently to release seeds, then winnow away debris with your fingers or a breeze.
By following these crop-specific harvesting techniques, you’ll capture seeds at their peak viability—ensuring strong germination rates when spring rolls around again. Remember: patience pays off in seed saving, so don’t rush the process!
4. How to Clean, Dry, and Store Seeds
Properly preparing your seeds for storage is the secret sauce to successful seed saving—especially if you want them to sprout strong next season. Follow these American homesteader-tested steps to ensure your seeds stay viable and healthy all winter long.
Step 1: Cleaning Your Seeds
Start by separating seeds from any plant material. For most vegetables (like beans or squash), gently rub off pulp or pod remains with your hands or a mesh strainer. For smaller seeds (like tomatoes), rinse them in water, let them settle, and pour off the debris. Remember: Clean seeds store better and last longer.
Step 2: Drying the Seeds
Spread cleaned seeds on a paper towel, coffee filter, or fine mesh screen in a single layer. Let them air dry in a cool, dry place out of direct sunlight for at least 7 days—sometimes up to two weeks for larger seeds. Stir occasionally to prevent clumping and mold.
Step 3: Storing Seeds Properly
Once completely dry, transfer seeds into airtight containers. Mason jars, small glass vials, or resealable plastic bags work well—just make sure there’s minimal moisture inside. Add a silica gel packet if you live in a humid area.
Recommended Storage Conditions
| Condition | Ideal Range |
|---|---|
| Temperature | Below 50°F (10°C) |
| Humidity | Below 40% |
Step 4: Labeling Your Seeds
This step is crucial for avoiding springtime confusion! Use waterproof labels or permanent markers on your containers. Include:
- CROP NAME (e.g., Brandywine Tomato)
- VARIETY (if known)
- SAVE DATE (month/year)
Example Seed Label Table
| CROP | VARIETY | SAVE DATE |
|---|---|---|
| Pumpkin | Connecticut Field | Oct 2024 |
| Lettuce | Bibb Butterhead | Sept 2024 |
Step 5: Prolonging Seed Viability Through Winter
If you have space, keep your seed containers in the refrigerator—not freezer—to extend their life. Avoid temperature swings by storing them at the back of the fridge, away from the door. Always let containers warm to room temp before opening to prevent condensation inside.
5. Common Mistakes to Avoid When Saving Seeds
Even seasoned homesteaders can run into trouble when saving seeds from their fall harvest. Understanding the most common pitfalls is key to ensuring a successful seed stash that will grow true-to-type crops next year. Below, we’ll break down frequent mistakes, with tips tailored for U.S. growers.
Poor Seed Selection
One of the biggest errors is saving seeds from unhealthy or underperforming plants. Always choose seeds from the healthiest, most vigorous plants, as these traits are likely to be passed on to future generations. Avoid saving seeds from hybrid varieties unless you’re comfortable with unpredictable results; hybrids often don’t breed true and may produce disappointing crops.
Cross-Pollination and Accidental Hybridization
Many American gardeners accidentally save seeds that have cross-pollinated, especially in crops like squash, corn, or peppers. This can result in strange or undesirable offspring next season. To maintain seed purity, isolate different varieties by distance, use physical barriers like row covers, or stagger planting times so that similar crops don’t flower simultaneously.
Improper Cleaning and Drying
If seeds aren’t cleaned and dried thoroughly before storage, they’re at high risk for mold and rot—a common problem in humid regions of the U.S. After harvesting, remove all pulp or plant debris, rinse well if needed (especially for tomatoes), and spread seeds out in a single layer on a screen or paper towel. Let them dry completely in a cool, airy spot away from direct sunlight.
Ignoring Pest Prevention
Tiny insects like weevils or moths can destroy stored seeds. Before putting seeds away for winter, inspect them closely for any sign of pests. Some homesteaders freeze their thoroughly dried seeds for a few days to kill off hidden bugs—just make sure the seeds are moisture-free first to prevent damage.
Storing Seeds in Poor Conditions
The classic mistake is tossing saved seeds into a shed or garage where they’re exposed to heat and humidity fluctuations. For best results, store your seeds in airtight containers (like mason jars) in a cool, dry place—many American homesteaders swear by refrigerators or climate-controlled basements for long-term storage.
Avoiding these pitfalls will help ensure your fall-harvested seeds stay viable, healthy, and ready to plant come springtime—keeping your homestead self-sufficient and thriving year after year.
6. Getting Ready for Next Season
Test Your Seeds for Viability
Before planting, it’s smart to make sure your saved seeds will actually sprout. A simple way is the germination test: dampen a paper towel, place ten seeds inside, fold it up, and keep it in a warm spot for a week. If at least seven seeds sprout, you have a 70% viability rate—which is pretty good! Toss any seeds that show mold or don’t germinate; there’s no sense wasting space in your garden on duds.
Plan Your Next Garden with Confidence
Now that you know which seeds are viable, start mapping out next season’s garden beds. Use your seed stash as the foundation for planning crop rotations and companion plantings. Make notes about which varieties performed well and where you want to try something new. This is the heart of homesteading—building on past experiences to grow better every year.
Record-Keeping Is Key
Keep a dedicated seed journal or spreadsheet with details like seed type, harvest date, source, and results from your germination tests. Record what worked (and what didn’t) to help refine your strategy each season. Good notes also make it easier to share knowledge and swap seeds with neighbors.
Join Seed Swaps and Community Networks
Homesteading in America is all about community. Connect with local gardeners and homesteaders by joining seed swaps—either at local meetups or through online forums like Facebook groups or Seed Savers Exchange. Swapping seeds helps maintain genetic diversity in your crops and builds lasting connections with fellow growers who share your values.
By testing your seeds, keeping solid records, and participating in community swaps, you’ll set yourself up for a thriving homestead garden next year—and help preserve heirloom varieties for generations to come.