Understanding Gravity-Fed Irrigation: What Is It and Why Choose It?
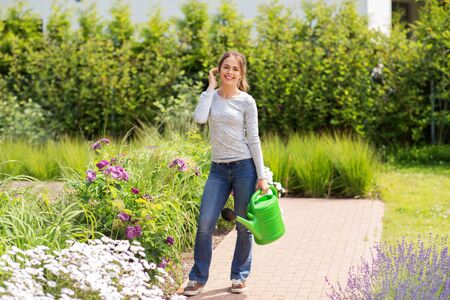
For many American homeowners, keeping a garden lush and healthy during hot summers can be a challenge, especially when water conservation is also a priority. A gravity-fed irrigation system offers a smart, sustainable way to keep your backyard thriving. But what exactly is this system, and why are more gardeners across the U.S. choosing it for their home gardens? Let’s break it down in simple terms.
What Is a Gravity-Fed Irrigation System?
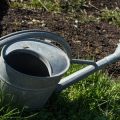
A gravity-fed irrigation system uses the natural force of gravity to move water from a higher point (like a rain barrel or elevated tank) down through hoses or pipes to your garden beds below. No electricity or fancy pumps needed—just good old-fashioned gravity. This method has been used around the world for centuries and is becoming more popular in American backyards because it’s easy to set up, budget-friendly, and eco-conscious.
Environmental Benefits
| Benefit | Description |
|---|---|
| Water Conservation | Delivers water directly to plant roots, reducing evaporation and runoff. |
| Low Energy Use | No need for electrical pumps—gravity does the work, cutting down on energy bills. |
| Rainwater Harvesting | Easily connects with rain barrels so you can reuse natural rainfall instead of tap water. |
| Minimal Soil Erosion | Gentle flow prevents soil from washing away, keeping your garden healthy. |
Why Gravity-Fed Systems Work Well for American Home Gardens
Gravity-fed irrigation systems are especially suited to American home gardens for several reasons:
- Cost-Effective: Most materials—like barrels, tubing, and connectors—are affordable and available at local hardware stores across the country.
- Drought-Friendly: With drought conditions becoming more common in many U.S. regions, using every drop of water efficiently is key.
- DIY-Friendly: You don’t need special skills or professional installation; most homeowners can put together a basic setup in an afternoon.
- Adaptable: Works well with raised beds, vegetable patches, flower borders, and even small lawns—whatever your backyard looks like.
Is a Gravity-Fed System Right for Your Backyard?
If you’re looking to save money on your water bill, use fewer resources, and enjoy healthier plants with less effort, a gravity-fed irrigation system could be the perfect fit for your American backyard garden. In the next section, we’ll look at how you can plan your own system step by step.
2. Planning Your System: Assessing Yard Layout and Water Needs
Understanding Your Backyard’s Slope
The slope of your backyard is one of the most important factors when installing a gravity-fed irrigation system. Since this system relies on gravity to move water, knowing where your yard is higher and lower helps you decide where to place your water source and how to route your pipes or hoses.
How to Check Your Yard’s Slope
- Walk around your yard after a heavy rain. Notice where water collects and where it flows.
- Use a simple carpenter’s level and a long board. Lay the board on the ground and place the level on top to see which way the ground tilts.
- If you have a larger space, consider using a line level attached to string for longer distances.
Mapping Out Garden Beds and Plant Locations
After understanding your yard’s slope, make a basic sketch of your backyard. Mark out all garden beds, trees, shrubs, and lawn areas that need watering. This will help you plan where to run irrigation lines so every plant gets enough water without wasting any.
| Area Type | Water Needs | Irrigation Recommendation |
|---|---|---|
| Vegetable Garden Beds | High (frequent, even moisture) | Soaker hoses or drip lines close to soil |
| Lawn Areas | Moderate (deep, less frequent) | Sprinkler heads or perforated hoses |
| Trees & Shrubs | Low (deep, occasional soaking) | Basin-style drip rings or slow-release devices |
| Potted Plants/Containers | High (fast drying) | Individual drip emitters or hand-watering backup |
Identifying Water Sources for Gravity-Fed Systems
The most common water sources for gravity-fed irrigation in American backyards are rain barrels and elevated storage tanks. Place your water source at the highest practical point in your yard—like next to a garage wall or garden shed—to maximize pressure from gravity.
Tips for Choosing Water Sources:
- Rain Barrels: Easy to set up under downspouts; great for collecting free rainwater.
- Elevated Tanks: Provide more consistent pressure; can be filled with hose or collected rainwater.
- Avoid placing the tank too far from the garden beds—longer distances reduce water pressure.
Putting It All Together: Drafting Your Irrigation Map
Create a simple map showing the location of your water source, garden beds, lawn areas, and major slopes. Draw possible routes for hoses or pipes. Make sure each area can get enough water with minimal elevation drops along the way. This planning stage will save time and effort when you start installing your gravity-fed irrigation system.

3. Gathering Essential Materials and Tools
Before you start setting up your gravity-fed irrigation system, its important to gather all the necessary materials and tools. Most of these items can be found at your local American hardware store, garden center, or even ordered online. Here’s a simple checklist to help you get started:
Essential Materials Checklist
| Item | Description | Where to Find |
|---|---|---|
| Barrel or Water Tank | Food-grade plastic barrel (55-gallon is common), or a specialized rain barrel for collecting and storing water | Home Depot, Lowe’s, local hardware store, online retailers |
| Hoses or Tubing | Garden hoses or flexible irrigation tubing for distributing water from the barrel to your plants | Garden centers, hardware stores |
| Connectors & Fittings | T-connectors, elbows, hose clamps, and end caps to join hoses and create custom routes | Irrigation section in hardware stores |
| Spigot or Faucet Kit | A spigot that fits your barrel, allowing you to control water flow easily | Plumbing section in hardware stores, rain barrel kits online |
| Filter or Screen | Keeps debris out of the system; mesh screens are great for rain barrels | Hardware stores, garden supply shops |
| Sturdy Stand or Platform (optional) | Raises the barrel above ground level to increase water pressure by gravity | Lumber section in hardware stores or use concrete blocks |
| Drip Emitters (optional) | For more precise watering directly at plant roots; attaches to tubing | Irrigation aisle at garden centers or online |
| Teflon Tape/Thread Sealant | Seals threaded connections to prevent leaks in your system | Plumbing supplies at any hardware store |
| Buckets & Measuring Tools (optional) | For testing flow rates and system performance before final setup | Around the house or at any department store |
Basic Tools You’ll Need
- Screwdriver and Pliers: For tightening clamps and assembling connectors.
- Utility Knife or Scissors: To cut hoses or tubing to desired lengths.
- Cordless Drill with Bits: Useful for making holes in barrels for spigots and fittings.
- Tape Measure: For measuring hose runs and ensuring accurate placement.
A Few Helpful Tips:
- If you’re reusing a barrel, make sure it’s food-grade and thoroughly cleaned before use.
- Select UV-resistant hoses or tubing so they last longer under the sun.
- If possible, bring measurements of your yard and planting beds when shopping for materials.
Your Local Hardware Store is Your Friend!
If you have questions about which parts fit together, don’t hesitate to ask staff at places like Ace Hardware or Tractor Supply Co. They’re usually familiar with common backyard irrigation setups and can point you in the right direction for everything you need.
4. Step-by-Step Installation Guide
Gather Your Materials
Before you get started, make sure you have all the supplies you need. Here’s a quick checklist to help you out:
| Item | Purpose |
|---|---|
| Water Barrel or Tank | Stores water at an elevated height for gravity flow |
| PVC or Poly Tubing | Main lines for water delivery |
| Drip Lines or Soaker Hoses | Distributes water to your plants |
| Connectors & Fittings | Joins tubing and directs flow |
| Filter (optional but recommended) | Keeps debris from clogging the system |
| Timer (optional) | Automates watering schedule |
| Cinder Blocks or Stand | Raises the barrel/tank above ground level for better pressure |
| Trowel or Shovel | Makes trenches for underground tubing (if needed) |
| Scissors or Pipe Cutter | Cuts tubing to length |
| Garden Stakes or U-Pins | Securly holds tubing in place on the soil surface |
Selecting the Right Location for Your Water Source
The higher you place your water tank, the better your water pressure will be. Most American backyard setups work great with a 2- to 4-foot elevation. Place your tank near a stable structure like a shed, fence, or use sturdy cinder blocks as a base. Make sure it’s close enough to your garden beds so that you don’t need excessive tubing.
Laying Out Tubing and Drip Lines
- Plan Your Layout: Sketch your garden and mark where each plant row or bed is located. Plan routes for your mainline tubing and branches off to each section.
- Place Main Tubing: Run your main tubing from the bottom outlet of the water barrel out toward your planting areas. Use connectors if you need to turn corners.
- Add Branches: Use T-connectors or splitters to branch off drip lines or soaker hoses directly into rows, raised beds, or around trees and shrubs.
Tip: Proper Placement for Different Plants
| Plant Type | Recommended Irrigation Method | Placement Tip |
|---|---|---|
| Vegetable Rows (like tomatoes, peppers) | Drip Line/Emitter per plant base | Lace drip line along the base of each row, placing emitters at each plant. |
| Lawn Areas or Ground Cover Beds | Soaker Hose zigzagged through area | Sweep hose back and forth for even coverage. |
| Shrubs and Trees | Circular Drip Line/Soaker Hose around root zone perimeter | Create a loop about 12–18 inches from trunk/stem. |
Connecting Everything Together and Securing Tubing
- Attach Filter: If using a filter, connect it directly to the barrel outlet before attaching your mainline tubing. This keeps clogs at bay.
- Tighten Connections: Push all fittings together firmly. For extra security, use hose clamps where possible.
- Stake Down Tubing: Use U-pins or stakes every few feet to keep tubing in place on top of soil—especially helpful in windy areas!
Adjusting Water Flow for Different Plants’ Needs
- If using adjustable emitters, set higher flows (1–2 gallons/hour) for thirstier plants like tomatoes; lower flows (<1 gallon/hour) are best for herbs and leafy greens.
- If you notice puddling around certain plants, reduce emitter output by twisting them closed slightly, or move the emitter further away from the stem.
Troubleshooting Common Issues During Installation
- If water isn’t reaching far beds, try raising the tank higher.
- If some sections are flooding while others stay dry, double-check for kinks in tubing or blockages in emitters.
This hands-on approach will help you get your gravity-fed irrigation system up and running smoothly in any American backyard!
5. Maintaining and Troubleshooting Your System
Regular Care Routines
Keeping your gravity-fed irrigation system in top shape doesn’t require a green thumb, but a little attention goes a long way! Check your system at least once a week during the growing season. Here’s a simple checklist:
| Task | How Often | What to Look For |
|---|---|---|
| Inspect hoses and tubing | Weekly | Kinks, cracks, or leaks |
| Clean filters/drippers | Monthly (or as needed) | Dirt buildup or clogs |
| Check water level in tank/barrel | Every few days (in summer) | Sufficient water for plants |
| Tighten connections | Monthly | Loose fittings or drips |
Handling Common Issues: Clogs & Leaks
If you notice some plants aren’t getting enough water, or there’s an unexpected puddle in your yard, don’t worry—these issues are pretty common and easy to fix.
Clogs
- Filters/Drippers: Remove and soak them in vinegar for an hour, then rinse with clean water.
- Tubing: Flush the lines by disconnecting the end cap and letting water run through for a few minutes.
- Prevent Future Clogs: Use screened rain barrels or place mesh over tank openings to keep debris out.
Leaks
- Tighten Connections: Hand-tighten any loose parts where you see dripping.
- Patching Holes: Small holes in tubing can be fixed with waterproof tape or by cutting out the damaged section and reconnecting with a coupler.
- Avoid Overpressure: Make sure your tank is not set too high above ground level; excessive pressure can cause leaks at joints.
Winterizing for Year-Round Use
If you live in a region with freezing winters, it’s important to protect your system from frost damage. Follow these steps before the first hard freeze:
- Drain all water: Disconnect hoses and open the lowest point in the system to let all water drain out. Leftover water can freeze and crack pipes.
- Store removable parts: Bring filters, drippers, and connectors indoors until spring.
- Cover tanks/barrels: If you use rain barrels, empty them and turn them upside down or cover tightly to prevent ice buildup.
- Avoid direct exposure: Bury exposed pipes shallowly or cover with mulch to add insulation against cold snaps.
A little regular TLC keeps your gravity-fed irrigation running smoothly, so your American backyard stays lush no matter the season!