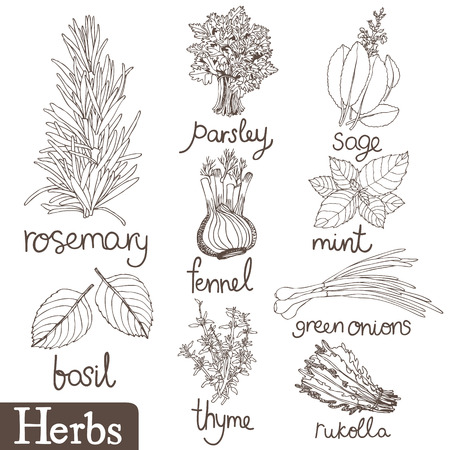
1. Choosing the Right Time to Harvest
Knowing when to harvest your herbs is key to getting the best flavor, aroma, and potency from your indoor garden. Each herb has its own sweet spot for harvesting, and timing can make a big difference in how they taste and smell. Whether youre growing basil on your kitchen windowsill or thyme under grow lights in your living room, here’s how to tell when your herbs are ready for picking.
Signs Your Herbs Are Ready
The best time to harvest herbs is usually just before they start to flower. At this stage, their essential oils—which give them their flavor and scent—are at their highest concentration. Here are a few general signs to look for:
- Fragrant aroma: If you gently rub a leaf between your fingers and it gives off a strong, fresh scent, its a good sign the plant is ready.
- Healthy leaf color: Leaves should be vibrant green (or appropriate color for the variety) without yellowing or browning edges.
- Full growth: Wait until the plant has enough foliage to support regular harvesting—typically when it reaches 6–8 inches tall.
Herb-Specific Harvesting Tips
Different herbs have different ideal harvest times based on their growth habits. Use this table as a quick reference guide:
| Herb | Best Time to Harvest | What to Look For |
|---|---|---|
| Basil | Before flowering, when plant is 6–8 inches tall | Bright green leaves with strong aroma |
| Mint | Just before flowering | Full, bushy stems with deep green leaves |
| Thyme | Before or during early bloom | Tender stems with aromatic leaves |
| Oregano | Right before flowers open | Pungent scent, full leafy stems |
| Parsley | Once leaves are large and flat (or curly) | Crisp texture and rich green color |
| Chives | When blades are at least 6 inches long | Tall, upright stalks with no yellowing tips |
Harvest in the Morning for Best Results
The best time of day to pick your herbs is in the morning after the dew has dried but before the sun gets too hot. This helps preserve the essential oils that give herbs their flavor and fragrance.
Avoid Over-Harvesting
As tempting as it is to snip away at your plants frequently, make sure not to take more than one-third of the plant at a time. This allows your herbs to keep growing strong and healthy indoors all season long.
Selecting the right moment to harvest ensures you get the most out of your indoor herb garden—not just in flavor but also in freshness and vitality.
2. Best Techniques for Harvesting Indoor Herbs
Harvesting your indoor herbs the right way helps keep them healthy and encourages new growth. Different herbs need slightly different approaches, but the goal is always the same: take what you need without harming the plant. Below are some simple and effective harvesting methods you can use in your indoor garden.
How to Cut, Pinch, and Trim Herbs
The method you choose depends on the type of herb youre growing. Heres a quick guide to help you decide:
| Herb Type | Best Harvesting Method | Tips |
|---|---|---|
| Basil | Pinch or snip above a leaf node | Always cut just above a pair of leaves to encourage bushier growth |
| Mint | Cut stems down to just above a leaf pair | Harvest regularly to prevent flowering and promote fresh leaves |
| Parsley | Snip outer stems at the base | Avoid cutting from the center; it slows down regrowth |
| Thyme | Trim with scissors about halfway down the stem | Wait until it’s at least 6 inches tall before harvesting |
| Rosemary | Snip off sprigs from woody stems | Only take 1/3 of the plant at a time to avoid stress |
| Cilantro (Coriander) | Cut outer leaves from the base | Harvest early before it bolts (goes to seed) |
| Chives | Use scissors to cut leaves near soil level | Avoid pulling as it can uproot the plant entirely |
General Harvesting Tips for Indoor Herbs
Timing Matters
The best time to harvest is in the morning after any dew has dried but before the sun gets too strong. This is when essential oils (which give herbs their flavor and aroma) are most concentrated.
Use Clean, Sharp Tools
Dull or dirty scissors can damage your plants or spread disease. Always use clean, sharp scissors or herb snips for best results.
Avoid Overharvesting
A good rule of thumb is to never harvest more than one-third of an herb plant at once. This gives it enough energy to keep growing strong.
Quick Tip:
If youre not sure whether to pinch or cut—pinching works well for soft-stemmed herbs like basil and oregano, while cutting is better for woody herbs like rosemary and thyme.
Caring for your herbs during harvest is just as important as watering and feeding them. With these simple techniques, you’ll enjoy fresh flavors while keeping your indoor garden thriving.
3. Preparing Freshly Harvested Herbs
Once you’ve harvested your herbs from your indoor garden, the next step is to prepare them properly for drying or storing. This part is crucial to preserve their flavor, fragrance, and the essential oils that make them so valuable in cooking and natural remedies. Heres how to gently clean and prep your herbs without damaging them.
Handle with Care
Herbs are delicate, especially varieties like basil, cilantro, and mint. Always handle them gently to avoid bruising, which can lead to loss of flavor and faster spoilage. Use garden scissors or sharp kitchen shears to snip the stems instead of pulling by hand.
Rinse Lightly
Even if your herbs were grown indoors, its a good idea to rinse them lightly to remove dust or any small insects. Fill a bowl with cool water and swish the herbs around gently. Avoid using strong water pressure as it may damage the leaves.
Tip:
If youre working with very tender herbs like parsley or dill, consider placing them in a colander and rinsing with a light spray of cool water.
Dry Thoroughly
After rinsing, its important to dry the herbs completely before storing or drying further. Excess moisture can lead to mold or rot during storage.
Recommended Drying Methods:
| Method | Description |
|---|---|
| Paper Towels | Lay herbs in a single layer on paper towels and gently pat dry. |
| Salad Spinner | A gentle spin helps remove excess water quickly without damage. |
| Air Dry | Spread herbs out on a clean dish towel and let them air dry in a cool spot. |
Trim and Sort
Remove any damaged or yellowing leaves, then trim the stems if needed. Group similar herbs together if youre drying multiple types at once—this makes it easier when you move on to the drying or freezing stage.
Avoid Crushing Leaves
The essential oils in herbs are concentrated in their leaves. To keep the aroma and taste intact, don’t crush or rub the leaves during prep. Keep everything as whole as possible until youre ready to use them in your recipes.
This careful preparation ensures your homegrown herbs retain their best qualities whether you’re storing them short-term in the fridge or drying them for later use.
4. Drying and Preserving Your Herbs
Once youve harvested your homegrown herbs, the next step is preserving their flavor for long-term use. Drying is one of the most effective ways to do this, especially for indoor gardeners who may not have access to outdoor drying racks or large storage spaces. Here are some easy drying methods you can try at home, plus handy tips for storing your dried herbs.
Best Drying Methods for Indoor Gardeners
Each herb dries a little differently, but these techniques work well for most common kitchen herbs like basil, thyme, oregano, mint, and parsley.
Air Drying
This traditional method works best for low-moisture herbs like rosemary, sage, and thyme.
- Gather small bunches of herbs and tie them together with twine or a rubber band.
- Hang upside down in a warm, dry spot away from direct sunlight—like a pantry or laundry room.
- Allow 1–2 weeks for full drying depending on humidity levels.
Using a Dehydrator
A dehydrator offers more control and faster results—great for leafy herbs like basil or mint that mold easily during air drying.
- Set the dehydrator to 95°F–115°F (35°C–46°C).
- Place herb leaves in a single layer on the trays.
- Check dryness after 1–4 hours; leaves should crumble easily when ready.
Oven Drying
If you don’t have a dehydrator, your oven can be a good backup option.
- Preheat your oven to its lowest setting (usually around 170°F / 77°C).
- Spread herb leaves on a baking sheet lined with parchment paper.
- Bake with the oven door slightly open to let moisture escape.
- Check every 30 minutes; most herbs dry in 1–2 hours.
Storing Dried Herbs
The key to keeping dried herbs flavorful is proper storage. Once your herbs are fully dry, follow these tips:
- Crumble or leave whole: Whole leaves retain flavor longer. Crumble only when youre ready to use them.
- Airtight containers: Use glass jars with tight-fitting lids or resealable plastic bags.
- No light or heat: Store containers in a dark cupboard or pantry away from heat sources like stoves or dishwashers.
| Storage Tip | Why It Matters |
|---|---|
| Use airtight containers | Prevents moisture from getting in and causing mold |
| Keep out of sunlight | Light breaks down flavor compounds over time |
| Label with date & name | Helps you track freshness and avoid mix-ups |
Dried herbs usually keep their best flavor for up to one year. After that, they’re still safe to use but might be less potent. Always crush a bit between your fingers—if it smells strong, it’s still good!
5. Storing Herbs for Long-Term Use
Once youve harvested your homegrown herbs, proper storage is key to preserving their flavor and aroma. Whether youre drying, freezing, or getting creative with herb-infused oils and butters, there are several easy ways to keep your herbs fresh for months.
Drying and Storing in Airtight Containers
Drying is one of the most common ways to store herbs. After harvesting, tie your herb stems into small bundles and hang them upside down in a dry, dark, and well-ventilated area. Once fully dried (usually after 1-2 weeks), remove the leaves from the stems and crumble them into airtight containers like glass jars or resealable tins. Store these containers away from direct sunlight or heat sources to maintain freshness.
Best Herbs for Drying
| Herb | Drying Time | Storage Tip |
|---|---|---|
| Thyme | 1 week | Keep whole sprigs until use for stronger flavor |
| Sage | 10 days | Store in layers with parchment paper to prevent crumbling |
| Oregano | 1-2 weeks | Crumble just before cooking for best taste |
| Rosemary | 1 week | Store needles whole; crush when needed |
Freezing Fresh Herbs
If you want to preserve the bright color and strong flavor of fresh herbs like basil, parsley, or cilantro, freezing is a great option. Chop the herbs and place them into ice cube trays with a little water or olive oil. Once frozen, transfer the cubes to labeled freezer bags for easy access when cooking.
Tips for Freezing Herbs:
- Basil: Blanch quickly in boiling water before freezing to prevent browning.
- Cilantro: Freeze in oil for easier blending into sauces later.
- Dill: Best frozen chopped and stored flat in freezer-safe bags.
Create Herb-Infused Oils and Butters
For a flavorful twist, try making herb-infused oils or compound butters. To make infused oil, gently warm olive oil with your chosen herbs (like rosemary or thyme), let it cool, then strain and store in a sterilized glass bottle in the fridge. For compound butter, mix finely chopped herbs into softened butter, roll into a log using parchment paper, and freeze it for later use on bread, veggies, or meats.
Creative Ideas:
- Lemon-thyme butter for grilled chicken or fish
- Basil-garlic oil as a dipping sauce or pasta topper
- Dill butter for corn on the cob or baked potatoes
No matter which method you choose, storing herbs properly means you can enjoy the taste of your indoor garden all year round.