1. Choosing the Right Location
Before you start building your raised garden bed, its important to find the perfect spot in your yard. A well-chosen location can make a big difference in how successful your garden will be. Here are the key things to consider:
Sunlight
Most vegetables and flowers need at least 6 to 8 hours of direct sunlight each day. Observe your yard throughout the day to see which areas get the most sun. Avoid placing your bed near tall trees, fences, or buildings that might cast shade.
Drainage
Your raised bed should be in a spot where water doesn’t collect after rain. Poor drainage can lead to root rot and other plant diseases. If you notice puddles forming in an area, its best to avoid placing your garden there.
Accessibility
Make sure your raised bed is easy to reach from all sides for planting, weeding, and harvesting. Leave enough space around it so you can walk or kneel comfortably. Also consider proximity to a water source—carrying watering cans across the yard can get tiring fast!
Quick Location Checklist
| Factor | What to Look For |
|---|---|
| Sunlight | 6–8 hours of direct sun daily |
| Drainage | No standing water after rain |
| Accessibility | Easy access on all sides; close to water source |
| Level Ground | Flat surface helps with stability and even watering |
| Away from Trees | Avoid roots competing with your plants for nutrients |
Pro Tip:
If youre not sure about sunlight levels, use a sunlight calculator or take notes over a few days. Morning sun is usually gentler and better for many plants than hot afternoon sun.
2. Selecting Materials and Tools
Choosing the right materials and tools is key to building a raised garden bed that lasts and fits your style and budget. Let’s look at some of the most popular materials used in the U.S., and go over the basic tools you’ll need to get started.
Popular Raised Bed Materials
Each material has its pros and cons. Here are three common options:
| Material | Pros | Cons |
|---|---|---|
| Cedar Wood | Natural resistance to rot, looks attractive, eco-friendly | More expensive than other woods, may weather over time |
| Recycled Plastic | Durable, low maintenance, resistant to rot and pests | Can be pricier up front, limited color options |
| Galvanized Steel | Modern look, extremely durable, resists rust for years | Heats up quickly in hot climates, can be more costly |
What to Consider When Choosing Materials
- Budget: Wood is generally cheaper upfront but may not last as long as plastic or metal.
- Aesthetics: Choose a material that matches your yard or garden design.
- Lifespan: If you want something long-lasting with minimal upkeep, go with recycled plastic or galvanized steel.
- Sustainability: Cedar and recycled materials are great eco-friendly choices.
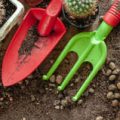
Basic Tools You’ll Need
You don’t need fancy equipment to build a raised bed—just a few essentials that might already be in your garage.
| Tool | Purpose |
|---|---|
| Tape Measure | To measure your wood or space accurately |
| Saw (hand saw or circular saw) | For cutting boards to size if needed |
| Screwdriver or Drill | For fastening pieces together securely |
| Screws (exterior-grade) | To hold the frame together; make sure they’re weather-resistant |
| Level | Makes sure your bed sits evenly on the ground |
| Work Gloves | Keeps your hands safe while handling materials |
A Few Optional Extras
- Liner Fabric: Helps keep soil contained and prevents weed growth from underneath.
- L-Brackets: Adds extra support at corners for wooden beds.
- Compost or Soil Mix: Ready to fill once your frame is set up.
Selecting the right combination of materials and tools will make your raised bed project smoother and more enjoyable. In the next section, we’ll cover how to assemble and position your garden bed for best results.
3. Building Your Raised Garden Bed
Now that you’ve picked the perfect spot and gathered your materials, it’s time to roll up your sleeves and build your raised garden bed. This step-by-step guide will help you create a sturdy, level bed that fits your space and gardening goals.
Step 1: Choose the Right Size
A common size for raised beds is 4 feet wide by 8 feet long, with a height of 12 to 24 inches. This size allows easy access from all sides without stepping into the bed, which keeps the soil loose and healthy.
| Bed Size | Best For | Notes |
|---|---|---|
| 4 x 4 | Small spaces or beginners | Easy to manage and reach all areas |
| 4 x 8 | Most backyard gardens | Provides plenty of planting space |
| Taller beds (18″-24″) | Root crops or less bending | Requires more soil but easier on the back |
Step 2: Gather Your Tools and Materials
You’ll need untreated lumber (like cedar or redwood), galvanized screws, a power drill, measuring tape, a level, and possibly corner brackets for extra support. Avoid pressure-treated wood if youre growing edibles.
Step 3: Cut and Prepare the Wood
If you’re using standard boards (like 2″x10″), cut them to your desired length and width. Sand any rough edges to avoid splinters.
Step 4: Assemble the Frame
- Lay out the boards on a flat surface in a rectangle or square shape.
- Screw the corners together using galvanized screws.
- Add corner brackets if needed for extra strength.
Step 5: Level the Ground
Select your garden spot and remove grass or weeds. Use a shovel to level the ground as much as possible. A level base helps prevent water runoff and uneven settling.
Step 6: Place the Bed Frame
Carefully place your assembled frame onto the leveled area. Use a level tool to check all sides are even. Adjust as needed by adding or removing soil underneath one side.
Step 7: Secure It (Optional)
If you live in an area with strong winds or want extra stability, you can stake down the corners using rebar or wooden stakes driven into the ground inside each corner.
Step 8: Add a Weed Barrier (Optional)
You can line the bottom with cardboard or landscape fabric to help suppress weeds while still allowing drainage.
Your raised garden bed is now ready for soil! In the next section, we’ll talk about how to fill it with the right mix for healthy plant growth.
4. Filling and Preparing the Soil
Once your raised garden bed is built, its time to fill it with the right soil mix. Good soil is the key to a successful garden, especially in raised beds where you have full control over the growing environment.
Why Soil Quality Matters
Unlike in-ground gardening, raised beds rely entirely on the soil you put into them. This means you can create the perfect blend for healthy plants. A well-balanced mix ensures proper drainage, nutrient availability, and root development.
Recommended Soil Mix for Raised Beds
The best soil mix for raised beds usually follows a basic formula that includes topsoil, compost, and other organic amendments. Heres a simple recipe:
| Component | Proportion | Purpose |
|---|---|---|
| Topsoil | 50% | Provides structure and bulk to the mix |
| Compost | 30% | Adds nutrients and improves soil texture |
| Aeration Material (like perlite or coarse sand) | 10% | Improves drainage and prevents compaction |
| Organic Amendments (such as worm castings or peat moss) | 10% | Boosts fertility and retains moisture |
Tips for Preparing Your Soil Mix
Use High-Quality Ingredients
Avoid using cheap fillers like subsoil or construction sand. Look for nutrient-rich compost and clean topsoil free from weeds or contaminants.
Mix Thoroughly Before Adding to Beds
You can blend your soil mix in a wheelbarrow or on a tarp. Make sure everything is evenly combined before filling your raised bed.
Fill Slightly Above the Bed Edge
The soil will settle over time, so its a good idea to fill your bed an inch or two above the rim initially.
Add Mulch on Top
A layer of mulch helps retain moisture, suppress weeds, and protect the soil structure.
Bonus Tip: Test Your Soil pH
Most vegetables thrive in slightly acidic to neutral soil (pH 6.0–7.0). You can use an at-home test kit to check your soils pH and adjust it if needed with lime (to raise pH) or sulfur (to lower pH).
With the right mix of ingredients and preparation, your raised garden bed will be ready to grow strong, healthy plants all season long.
5. Planting and Maintenance Tips
Once your raised garden bed is built and filled with soil, it’s time to start planting. Choosing the right plants and maintaining them properly will help your garden thrive. Here are some beginner-friendly tips to get you started.
Choosing the Right Plants
Start by selecting plants that match your climate zone and sunlight availability. Raised beds warm up faster in the spring, so they’re ideal for vegetables like tomatoes, peppers, and lettuce. Herbs such as basil, thyme, and parsley also do well in raised beds.
Easy Plants for Beginners
| Plant | Sunlight | Water Needs | Best Season |
|---|---|---|---|
| Lettuce | Partial Sun | Moderate | Spring/Fall |
| Tomatoes | Full Sun | High | Late Spring/Summer |
| Zucchini | Full Sun | Moderate | Summer |
| Basil | Full Sun | Moderate | Summer |
| Radishes | Full Sun | Low | Spring/Fall |
Seasonal Planting Guide
The timing of planting is just as important as what you plant. Use this quick seasonal guide to help plan your garden year-round:
| Season | Crops to Plant |
|---|---|
| Spring (March – May) | Lettuce, peas, carrots, radishes, spinach |
| Summer (June – August) | Tomatoes, peppers, cucumbers, zucchini, basil |
| Fall (September – November) | Kale, broccoli, beets, turnips, garlic (for overwintering) |
| Winter (December – February) | If mild climate: kale, spinach under covers; otherwise prep soil for spring. |
Watering Techniques
A consistent watering schedule helps keep your plants healthy. Raised beds drain quickly, so they may need more frequent watering—especially in hot weather. Water early in the morning or in the evening to reduce evaporation.
Irrigation Tips for Raised Beds:
- Add mulch to retain moisture and reduce weeds.
- Avoid overhead watering to prevent disease—use a soaker hose or drip irrigation if possible.
- Poke your finger into the soil; if its dry two inches down, its time to water.
Pest and Weed Control
Pests and weeds can still find their way into raised beds. Keep an eye out for common issues like aphids or powdery mildew. Pull weeds regularly and use natural deterrents like neem oil or companion planting to protect your crops.
Pest-Repelling Companion Plants:
| Main Crop | Pest Problem | Helpful Companion Plant |
|---|---|---|
| Tomatoes | Aphids/Whiteflies | Basil or Marigolds |
| Cabbage family (broccoli, kale) | Cabbage moths | Dill or Nasturtiums |
| Zucchini/Cucumbers | Squash bugs/Cucumber beetles | Nasturtiums or Radishes (trap crop) |
Simplifying Garden Maintenance
You don’t have to spend hours each day in the garden to keep it productive. Spend just a few minutes each day checking for pests, pulling small weeds before they spread, and making sure your plants are getting enough water. It’s all about consistency over perfection!
A little daily attention goes a long way—and soon youll be harvesting fresh veggies right from your backyard!