1. Choosing the Right Flowers for Drying
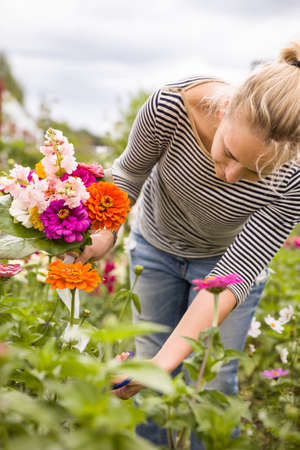
Drying flowers is a wonderful way to enjoy their beauty long after theyve been cut. But not all flowers dry well, so choosing the right ones is key. Some types retain their color and shape better than others, and picking them at the right time makes a big difference.
Best Flowers for Drying
Here are some of the most popular and reliable flowers that dry beautifully:
| Flower Type | Why Its Great for Drying |
|---|---|
| Statice | Keeps its color and shape extremely well |
| Lavender | Retains fragrance and color; dries quickly |
| Strawflower | Papery petals hold color and form nicely |
| Baby’s Breath (Gypsophila) | Adds delicate texture; dries easily |
| Roses | Dried roses can be stunning if picked at the right stage |
| Cockscomb (Celosia) | Unique texture and vibrant colors stay intact |
When to Harvest Flowers for Drying
The timing of your harvest plays a big role in how your dried flowers will look. Here are some general tips for picking flowers at their best:
- Pick in the morning: Wait until the dew has dried but before the sun gets too strong.
- Avoid full bloom: Choose flowers that are just about to open or have just opened. Fully mature blooms may fall apart as they dry.
- Inspect for damage: Avoid any flowers with bruises, tears, or signs of disease.
- Cut with long stems: This gives you more flexibility when arranging or hanging them to dry.
Pro Tip: Think About Color Retention
Certain flower colors tend to fade more than others during drying. Deep purples, bright yellows, and rich reds often hold up better than pale pinks or whites. If youre aiming for a vibrant dried bouquet, keep this in mind when selecting your blooms.
Harvest Checklist
- [ ] Flower is just starting to bloom
- [ ] No signs of damage or disease
- [ ] Stems are healthy and long enough to hang upside down
- [ ] Picked during cool morning hours after dew has evaporated
Selecting the right flowers and harvesting them at the ideal time sets the foundation for successful drying. With these basics in place, youre ready for the next step in preserving your cut flowers.
2. Popular Flower Drying Methods
Drying flowers is a fun and rewarding way to preserve their beauty long after theyve been cut. Whether you’re saving a special bouquet or creating home decor, choosing the right method depends on the type of flower and the look you’re going for. Let’s explore four popular flower drying techniques: air drying, pressing, silica gel, and microwave drying.
Air Drying
This is the most traditional and budget-friendly method. It works best for hardy flowers like roses, lavender, and baby’s breath.
How to Do It:
- Remove extra leaves from stems.
- Gather flowers into small bunches and tie them with string or rubber bands.
- Hang them upside down in a dry, dark, well-ventilated space for 1-3 weeks.
Best For:
Flowers with sturdy stems and petals that hold their shape well.
Pressing
Pressed flowers are perfect for crafts like greeting cards or framed art. This technique flattens the flowers while preserving their color.
How to Do It:
- Place flowers between two sheets of parchment paper or inside a book.
- Add weight on top (like a stack of books) and leave for 1-2 weeks.
Best For:
Daisies, pansies, violets, and other small or flat blooms.
Silica Gel Drying
This method helps retain color and shape better than air drying. Its great for delicate or colorful flowers like dahlias or peonies.
How to Do It:
- Fill an airtight container with a layer of silica gel crystals.
- Place flowers face-up and gently cover them completely with more crystals.
- Seal the container and leave it for 3-7 days depending on flower size.
Best For:
Blooms that are thick or have many layers of petals.
Microwave Drying
A quick version of silica gel drying using your microwave. Ideal if youre short on time but still want high-quality results.
How to Do It:
- Place flowers in a microwave-safe container with silica gel as above.
- Heat in short bursts (30 seconds) at medium power until dry—usually takes 1-2 minutes total.
- Let them cool before removing from the gel.
Best For:
Single blooms or small batches when time is limited.
Comparison Table
| Method | Time Needed | Best For | Pros | Cons |
|---|---|---|---|---|
| Air Drying | 1–3 weeks | Tough-stemmed flowers like lavender, roses | No cost, simple process | Takes longer, may lose color |
| Pressing | 1–2 weeks | Daisies, pansies, flat flowers | Great for crafts, easy setup | No 3D shape retention |
| Silica Gel Drying | 3–7 days | Dahlias, peonies, delicate blooms | Keeps color and shape well | Slight cost for materials |
| Microwave Drying | A few minutes + cooling time | Bachelor buttons, roses (small batches) | Fastest method with good results | Slight learning curve; needs attention |
No matter which method you choose, be sure to handle your flowers gently throughout the process. With a little patience and care, you’ll be able to enjoy your favorite blooms all year round!
3. Step-by-Step Guide to Drying Flowers
Drying flowers at home is a fun and rewarding way to preserve your favorite blooms. Whether youre saving a special bouquet or creating homemade decor, following these simple steps will help you dry flowers successfully.
Step 1: Choose the Right Flowers
Select fresh flowers that are just starting to bloom. Avoid any with brown spots or wilted petals. Some flowers dry better than others—roses, lavender, statice, and baby’s breath are great choices.
Best Flowers for Drying
| Flower Type | Best Drying Method |
|---|---|
| Roses | Air drying or silica gel |
| Lavender | Air drying |
| Hydrangeas | Vase drying |
| Baby’s Breath | Air drying |
Step 2: Prepare the Flowers
Trim the stems to your desired length, remove extra leaves, and group them into small bunches if needed. Use rubber bands or string to tie the stems together loosely.
Step 3: Choose Your Drying Method
Air Drying (Most Common)
This method works well for sturdy flowers like lavender and roses.
- Hang the flower bunches upside down in a warm, dry place with good air circulation.
- Avoid direct sunlight to prevent color fading.
- Drying time: Typically 1–3 weeks depending on humidity and flower type.
Silica Gel Drying (For Delicate Blooms)
This method helps retain flower shape and color.
- Place a layer of silica gel in an airtight container.
- Gently nestle flowers into the gel and cover completely.
- Seal the container and leave it for several days (usually 5–7 days).
Vase Drying (Great for Hydrangeas)
This technique uses minimal water to allow flowers to dry naturally in a vase.
- Add about an inch of water to the vase.
- Place the stems inside and let them absorb the water slowly as they dry out.
- No need to refill—once the water is gone, the flowers should be dry in about two weeks.
Step 4: Check for Complete Dryness
You’ll know your flowers are fully dried when they feel crisp and papery. If they still feel soft or damp, give them more time.
Step 5: Store or Display Your Dried Flowers
Once dried, keep your flowers away from moisture and direct sunlight. Store them in a box lined with tissue paper or display them in a vase without water. For long-lasting results, consider spraying them with floral sealant or hairspray for added protection.
Helpful Tip:
If youre working in a humid environment, use a dehumidifier or fan to speed up the drying process and prevent mold growth.
Dried flowers can last for months or even years with proper care—perfect for DIY wreaths, keepsakes, or rustic home decor!
4. Preserving Dried Flowers for Long-Lasting Beauty
Once your flowers are fully dried, preserving them properly is key to keeping their beauty intact for months or even years. With the right sealing, storing, and displaying techniques, you can enjoy your dried blooms well beyond their fresh stage.
How to Seal Dried Flowers
Sealing helps protect dried flowers from moisture, dust, and fading. Here are a few common methods:
| Method | Description | Best For |
|---|---|---|
| Hairspray | A light mist of unscented hairspray can help hold petals in place and add a protective coat. | Delicate blooms like baby’s breath or lavender |
| Acrylic Spray Sealer | Clear acrylic spray provides a durable, long-lasting seal that resists yellowing. | Most types of dried flowers |
| Silica Gel Residue Brush-Off | If you used silica gel for drying, gently brushing off excess particles helps preserve appearance. | Dried flowers from silica gel drying method |
Proper Storage Techniques
If youre not displaying your dried flowers right away, proper storage is essential to prevent damage.
Tips for Storing Dried Flowers:
- Keep them dry: Store in a low-humidity environment to avoid mold or brittleness.
- Use acid-free tissue paper: Wrap flowers loosely to prevent crushing and color transfer.
- Avoid direct sunlight: Sunlight can fade colors quickly, so choose a dark storage area.
- Use airtight containers: Protects against pests and environmental changes.
Displaying Your Dried Flowers
Dried flowers make charming additions to your home décor. Here’s how to display them while keeping them protected:
Display Ideas:
- Shadow boxes: Frame your favorite arrangement behind glass to keep dust out.
- Mason jars or vases: Keep arrangements upright and contained with minimal handling.
- Dried flower wreaths: Hang on interior doors or walls away from heat sources and windows.
- Cloches or bell jars: Provide both style and protection from air exposure.
Extra Tips for Longevity
- Avoid high-traffic areas: Reduces the chance of accidental bumps or knocks.
- No water needed: Never place dried flowers in water—this will ruin them!
- Dust gently: Use a soft brush or hairdryer on cool setting to remove dust occasionally.
With just a little care, your dried flowers can remain a beautiful part of your home year-round. By sealing, storing, and displaying them correctly, you’ll enjoy their natural charm far beyond their bloom date.
5. Creative Uses for Dried Flowers
Dried flowers arent just for keeping memories—they can become beautiful, lasting accents in your home and meaningful parts of handmade gifts. Once youve mastered the steps of drying and preserving your cut flowers, its time to get creative with how you use them. Here are some fun and stylish ways to incorporate dried blooms into DIY projects that match American design tastes.
Home Décor Ideas
Dried flowers bring a rustic, cozy charm to interiors. Whether youre going for farmhouse chic or boho vibes, these ideas can help you decorate with a personal touch:
| Project | Description |
|---|---|
| Mason Jar Bouquets | Arrange small dried flower bundles in mason jars for a farmhouse-style centerpiece or shelf décor. |
| Wreaths | Create seasonal wreaths using grapevine bases and dried blooms like lavender, eucalyptus, or roses. |
| Wall Art | Press dried flowers between glass panes in a floating frame for a minimalist botanical display. |
| Candle Rings | Make mini wreaths to circle around candles on a dining table or mantelpiece. |
Handmade Gifts
Dried flowers add sentimental value and elegance to DIY gifts. These make great presents for birthdays, weddings, housewarmings, or holidays:
- Sachets: Fill small fabric pouches with dried petals and herbs for fragrant drawer fresheners.
- Personalized Greeting Cards: Glue pressed flowers onto cardstock for unique birthday or thank-you cards.
- Gift Toppers: Tie a sprig of dried lavender or babys breath onto wrapped gifts with twine for an extra-special touch.
- Homemade Potpourri: Mix dried petals with essential oils and spices in a decorative jar as a thoughtful gift set.
Craft Projects
If you love hands-on creativity, try these floral-inspired crafts that blend nature with art:
- Resin Jewelry: Embed small dried flowers into resin molds to create earrings, pendants, or keychains.
- Bookmarks: Use clear laminate sheets to seal pressed flowers into sturdy bookmarks—great for gifting or personal use.
- Candlemaking: Decorate the outside of homemade candles with pressed flowers for an artisanal look (ensure fire safety).
No matter your style—modern minimalism or vintage Americana—dried flowers offer endless options for creativity. With just a little effort, your preserved blooms can brighten up your living space and bring joy to others through heartfelt handmade items.