1. Why Choose Recycled Materials for Planters
Using recycled materials for your DIY planters is more than just a creative trend—its a smart and sustainable choice that benefits both the environment and your personal style. By giving new life to items that would otherwise end up in landfills, youre reducing waste while adding character to your garden or indoor space.
Environmental Benefits
Recycling everyday objects into planters helps cut down on the demand for new manufacturing, which in turn saves energy and reduces greenhouse gas emissions. It also keeps non-biodegradable materials like plastic, metal, or glass out of landfills. Here’s a quick look at how different recycled materials can have a positive environmental impact:
| Material | Environmental Benefit |
|---|---|
| Plastic Bottles | Reduces plastic waste and pollution |
| Tin Cans | Cuts down on metal production and mining impact |
| Glass Jars | Minimizes landfill volume and conserves raw materials |
| Old Wood Crates | Repurposes wood without deforestation |
Aesthetic Appeal
Recycled planters offer a unique, eclectic look that store-bought pots often cant match. Whether youre going for rustic charm, industrial vibes, or modern minimalism, theres always a way to style repurposed materials to fit your home or garden decor. Plus, each planter tells its own story—an old teapot becomes a quirky succulent pot, or a worn-out boot transforms into a whimsical flower display.
Create One-of-a-Kind Pieces
No two recycled planters are exactly the same, which means you get custom decor without the custom price tag. Its an opportunity to express your creativity and showcase your personality through design. You’re not just planting—you’re crafting something meaningful.
A Budget-Friendly Option
You don’t need to spend a lot of money to make your garden beautiful. Most recycled materials are free or very low-cost. Instead of throwing away containers, jars, or even old furniture, you can turn them into stylish homes for your plants.
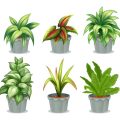
2. Common Household Items That Make Great Planters
Turning everyday household items into planters is a fun, creative way to reduce waste and add personality to your garden or home. You don’t need fancy tools or expensive materials—just a little imagination and some common items you probably already have lying around.
Mason Jars
Mason jars are a favorite in DIY gardening projects. Their clear glass lets you see soil layers and root growth, making them great for herbs or succulents. Add a layer of pebbles at the bottom for drainage, fill with potting mix, and plant your greenery. You can hang them on walls, place them on windowsills, or even create a vertical herb garden in your kitchen.
Tin Cans
From soup cans to coffee tins, metal containers can easily be transformed into rustic-looking planters. Clean them thoroughly, punch a few drainage holes in the bottom, and paint or decorate them to match your style. Theyre ideal for small plants like basil, mint, or colorful flowers.
Old Boots
Don’t toss out those worn-out rain boots or hiking shoes—they make quirky and waterproof planters! Simply cut holes for drainage if needed and fill with soil. Their unique shapes give your garden or porch a whimsical touch, perfect for adding character to outdoor spaces.
Wood Pallets
Wood pallets can be repurposed into vertical gardens, planter boxes, or raised beds. Sand them down to avoid splinters and use landscape fabric behind each slat to hold soil in place. They’re great for growing lettuce, strawberries, herbs, and other shallow-rooted plants.
Quick Reference Guide: Everyday Items as Planters
| Item | Best For | Tips |
|---|---|---|
| Mason Jars | Herbs, succulents | Add pebbles for drainage; great for indoor use |
| Tin Cans | Small flowers or herbs | Punch holes in the bottom; paint for style |
| Old Boots | Outdoor flowers, decorative plants | Ensure proper drainage; adds character to porches |
| Wood Pallets | Lettuce, strawberries, herbs | Create vertical gardens; line with fabric to hold soil |
![]()
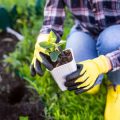
3. Step-by-Step Guide to Building Your Own Recycled Planter
Creating your own recycled planter is not only a fun weekend project, but also a smart way to reduce waste and add personality to your garden or home. Heres a simple, beginner-friendly guide to help you turn everyday items into stylish planters using basic tools and supplies.
Materials You’ll Need
| Item | Description |
|---|---|
| Recycled Container | An old tin can, mason jar, wooden crate, milk jug, or even worn-out boots |
| Drill or Nail & Hammer | For creating drainage holes at the bottom of the container |
| Potting Soil | A mix suitable for the type of plant you’re growing (succulents, herbs, etc.) |
| Plants or Seeds | Your choice—herbs, succulents, flowers, or small vegetables |
| Acrylic Paint (Optional) | If you want to decorate your planter for extra flair |
Step-by-Step Instructions
Step 1: Choose Your Container
Select something sturdy and clean. Metal cans, yogurt containers, and wood boxes are great options. Make sure it’s big enough for the plant you have in mind.
Step 2: Create Drainage Holes
If the container doesn’t already have holes at the bottom, use a drill or hammer and nail to make 3–5 small holes. This prevents water from pooling and causing root rot.
Step 3: Add a Base Layer (Optional)
You can add a thin layer of small rocks or pebbles at the bottom of the container to improve drainage further.
Step 4: Fill with Potting Soil
Scoop in potting soil until the container is about three-quarters full. Gently press it down without compacting it too much.
Step 5: Plant It!
Add your plant or seeds. If youre transplanting, dig a small hole in the center of the soil and place your plant inside. Cover roots with soil and pat gently around the base.
Step 6: Water Lightly
Add enough water to moisten the soil evenly. Be careful not to overwater—your planter should drain easily through the holes.
Step 7: Decorate (Optional)
This is where you can get creative! Use acrylic paint to add color, patterns, or labels to your recycled planter. Let dry completely before placing indoors or outside.
Troubleshooting Tips
- No Drainage? Place a layer of gravel at the bottom or be sure to water lightly.
- Moldy Smell? Too much water—make sure drainage is working well and don’t overwater.
- Poor Growth? Check if your plant has outgrown its space or needs more sunlight.
This easy DIY project lets you get creative while staying eco-conscious. Whether youre adding greenery to your patio, kitchen windowsill, or backyard garden, these recycled planters are a practical and charming solution.
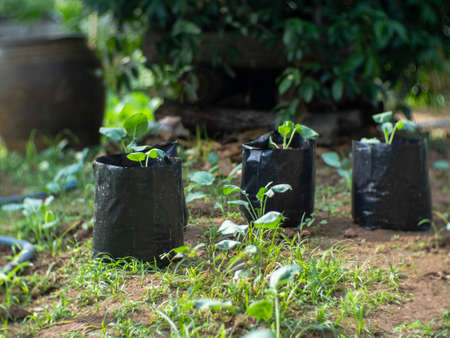
4. Tips for Planting and Drainage in Non-Traditional Containers
When youre turning old boots, tin cans, or dresser drawers into planters, its important to think about the needs of your plants—especially drainage, soil, and the type of plant you choose. Heres how to make sure your recycled container gardens thrive.
Drainage: Let the Water Out
Good drainage is essential to prevent root rot and keep your plants healthy. Most non-traditional containers weren’t designed for plants, so they often lack built-in drainage holes. Here’s what you can do:
- Drill Holes: Use a drill to create 2–4 small holes at the bottom of metal, wood, or plastic containers.
- Add a Drainage Layer: If drilling isn’t possible (like with glass or ceramic), add a layer of pebbles, gravel, or broken terracotta pieces before adding soil to help excess water settle away from roots.
- Use a Liner: For porous or delicate containers, line them with landscape fabric or plastic (poke holes for drainage) before adding soil.
Choosing the Right Soil
The right soil mix makes all the difference. Garden soil from your backyard can be too dense and may contain pests. Instead, use one of these options based on plant type:
| Plant Type | Recommended Soil Mix |
|---|---|
| Succulents & Cacti | Cactus mix or potting soil mixed with sand/perlite (2:1 ratio) |
| Herbs & Vegetables | Organic potting mix with compost added for nutrients |
| Houseplants (e.g., pothos, ferns) | All-purpose potting mix with good aeration |
Selecting the Right Plants
The size, material, and drainage capability of your container will impact which plants work best. Here are some ideas for different upcycled planters:
| Container Type | Best Plant Choices |
|---|---|
| Tin Cans | Basil, chives, succulents |
| Mason Jars or Glass Jars | Aloe vera, spider plants (with careful watering) |
| Shoes or Boots | Pansies, petunias, sedum |
| Wooden Drawers or Crates | Lettuce, mint, trailing ivy |
Extra Tips for Success
- Sunlight Matters: Make sure your container is placed where it gets enough light based on the plant’s needs.
- Water Carefully: Containers without drainage need lighter watering—watch for soggy soil.
- Repot as Needed: Some plants outgrow their space quickly. Monitor root growth and upgrade containers when necessary.
With just a little creativity and attention to planting basics like drainage and soil selection, you can turn almost anything into a thriving DIY planter. Its all about giving new life to old items—and keeping your green space stylish and sustainable.
5. Personalizing Your Planters for Home or Garden Decor
Once youve created your DIY planters from recycled materials, its time to make them your own. Personalizing planters is a fun and creative way to match them with your homes interior design or enhance the natural vibes of your outdoor space. From painting and decorating to labeling, here are some simple ways to give your planters a stylish and unique touch.
Painting Ideas
A coat of paint can completely transform the look of any container. Use acrylic paints for indoor planters and weather-resistant spray paint for outdoor ones. Get creative with patterns—stripes, polka dots, or geometric designs are easy to do and look great. You can also try color blocking by using painter’s tape to section off areas before painting.
| Paint Style | Best For | Tips |
|---|---|---|
| Solid Color | Modern indoor spaces | Use matte finishes for a sleek look |
| Chalkboard Paint | Kitchen herb planters | Easily label plants with chalk |
| Ombre Effect | Boho or artistic settings | Blend two colors using a sponge |
Decorating Techniques
If painting isnt your thing, there are plenty of other ways to decorate:
- Twine Wrapping: Wrap jute twine around a can or jar for a rustic farmhouse feel.
- Tiling or Mosaic: Glue broken tiles or colorful glass pieces onto the surface for an artsy look.
- Lace & Fabric: Use fabric scraps or lace trim for soft, vintage charm.
Add Texture and Personality
You can even glue on small items like buttons, shells, bottle caps, or beads. These details add texture and help tell a story with each planter you create.
Clever Labeling Options
If youre growing herbs, succulents, or veggies, labeling helps keep things organized and stylish. Here are some ideas:
- Popsicle Stick Labels: Write plant names on painted sticks and insert them into the soil.
- Mason Jar Lids: Attach labeled lids to the front of the planter using glue or wire.
- Duct Tape Tags: Use colorful duct tape as a label strip and write on it with permanent marker.
Create a Theme
You can even personalize your planters based on seasons (think pumpkins in fall colors) or holidays (like red, white, and blue for July 4th). The possibilities are endless when you let your creativity shine!
6. Inspiring Examples from the Zero-Waste Gardening Community
Across the U.S., gardeners are proving that sustainability and style can go hand in hand by transforming everyday waste into beautiful, functional planters. Here are some real-life examples of creative upcycling projects that have inspired others to give zero-waste gardening a try.
Upcycled Planter Projects from Everyday Americans
| Gardener | Location | Recycled Material Used | Creative Twist |
|---|---|---|---|
| Lisa M. | Austin, TX | Old cowboy boots | Turned worn-out boots into quirky herb planters with drainage holes drilled in the soles. |
| The Green Family | Boulder, CO | Metal coffee cans | Painted cans with chalkboard paint for labeling and mounted them on a backyard fence. |
| James T. | Portland, OR | Broken dresser drawers | Stacked drawers like steps and planted succulents for a layered garden look. |
| Ava & Drew | Nashville, TN | Mason jars and old wood pallets | Created a vertical garden with herbs by attaching jars to pallet slats with hose clamps. |
| Sandra B. | Savannah, GA | Vintage teapots and mugs | Repurposed mismatched ceramics into charming windowsill planters for small flowers. |
Why These Projects Work
These DIY ideas succeed because they combine practical gardening needs—like drainage and space efficiency—with personal style and environmental responsibility. Most importantly, they show that you don’t need fancy tools or expensive materials to get started. A little imagination goes a long way!
Tips From the Community:
- Add Drainage: Whether its drilling holes or adding gravel at the bottom, proper drainage is key to plant health.
- Weatherproof It: Use outdoor-safe paints or sealants on wooden or metal containers to extend their life outdoors.
- Label Creatively: Chalkboard paint, stencils, or even hand-painted signs can help keep your garden organized and fun.
- Think Vertical: Pallets, ladders, and stacked crates make excellent structures for small-space gardening.
Want to Join In?
If you’re feeling inspired, start small—look around your home for items ready for a second life as a planter. Youll not only reduce waste but also add unique charm to your garden space. Keep sharing your creations online using hashtags like #ZeroWasteGardening or #DIYPlanters to connect with like-minded gardeners across the country!