1. Why Composting Matters
Composting is one of the easiest and most impactful ways you can help the environment right from your own backyard. Every year, millions of tons of food scraps and yard clippings end up in landfills across the United States. When organic waste decomposes in landfills without proper airflow, it releases methane—a greenhouse gas over 25 times more potent than carbon dioxide.
By composting at home, youre not just reducing the amount of waste that goes to landfills, youre also cutting down on harmful emissions. But the benefits don’t stop there. Composting turns everyday kitchen and yard waste into a nutrient-rich soil amendment often called “black gold” by gardeners. This natural fertilizer helps your plants grow healthier without relying on chemical-based products.
Environmental Benefits of Composting
| Benefit | Description |
|---|---|
| Reduces Landfill Waste | Keeps food scraps and yard debris out of overflowing landfills. |
| Decreases Methane Emissions | Prevents the release of methane gas by allowing organic matter to decompose with oxygen. |
| Supports Soil Health | Enriches soil with nutrients, improving its texture, water retention, and fertility. |
Practical Benefits for Home Gardeners
- Saves Money: Reduce the need for store-bought fertilizers and soil conditioners.
- Improves Plant Growth: Compost provides essential nutrients for vegetables, flowers, and lawns.
- Reduces Water Usage: Healthy soil retains moisture better, meaning less watering is needed.
A Simple Act with Big Results
You don’t need to be a master gardener or have a huge backyard to start composting. Whether you live in a suburban home or an apartment with a small patio, there’s a composting method that can work for you. By turning your kitchen scraps and yard waste into garden gold, youre taking part in a sustainable practice that makes a real difference—for your garden and the planet.
2. What You Can (and Can’t) Compost
Composting is a great way to turn everyday kitchen scraps and yard waste into rich, nutritious soil for your garden. But not everything belongs in the compost pile. Knowing what you can and can’t compost is key to keeping your pile healthy, odor-free, and effective.
What You CAN Compost
The best compost piles are made from a balance of “greens” (wet, nitrogen-rich materials) and “browns” (dry, carbon-rich materials). Here’s a breakdown of common compost-friendly items:
| Greens (Nitrogen-Rich) | Browns (Carbon-Rich) |
|---|---|
| Fruit and vegetable scraps | Dry leaves |
| Coffee grounds and filters | Shredded newspaper |
| Tea bags (non-plastic) | Cardboard (non-glossy) |
| Grass clippings (in moderation) | Sawdust (from untreated wood) |
| Eggshells (crushed) | Straw or hay |
What You Should AVOID Composting
Certain items can attract pests, create bad odors, or introduce harmful bacteria. Keep these out of your compost pile:
- Dairy products: Milk, cheese, yogurt—these can smell and attract animals.
- Meat and bones: Slow to break down and very attractive to pests.
- Oily or greasy foods: Including salad dressings or fried food scraps.
- Pesticide-treated plants: Chemicals may survive the composting process.
- Pet waste: Especially from dogs and cats; it can carry pathogens.
- Synthetic materials: Plastic tea bags, glossy paper, or anything non-biodegradable.
Tips for Success
Balance is Key
A good rule of thumb is to aim for about 2 parts browns to 1 part greens. Too many greens can make your pile wet and smelly, while too many browns slow down decomposition.
Chop It Small
The smaller the pieces, the faster they’ll break down. Chop large fruit peels or yard waste before tossing them in.
Avoid Overloading One Type of Waste
Mix it up! A diverse compost pile decomposes more efficiently than one made up mostly of just grass clippings or veggie peels.
By sticking to compost-friendly materials and avoiding common troublemakers, you’re well on your way to creating a thriving compost pile that gives back to your garden in a big way.
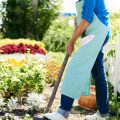
3. Setting Up Your Compost System
Composting isnt one-size-fits-all. Whether you live in a spacious suburban home or a small city apartment, theres a composting method thats just right for your lifestyle and space. Lets explore the most popular composting systems and help you find the best fit.
Backyard Compost Bins
If you have outdoor space, a backyard compost bin is a classic and effective choice. These bins are great for handling large amounts of yard waste like grass clippings, leaves, and garden trimmings, along with kitchen scraps. You can build your own bin with wood pallets or buy one made from recycled plastic at most home improvement stores.
Pros:
- Handles large volumes
- Low maintenance once set up
- Great for gardeners who want lots of compost
Cons:
- Requires outdoor space
- May attract pests if not maintained properly
Compost Tumblers
Tumblers are enclosed containers mounted on a stand that can be turned to mix the contents easily. They’re ideal for people who want faster results with less effort.
Pros:
- Speeds up decomposition process
- Keeps pests out
- Neat and compact design
Cons:
- Limited capacity compared to open bins
- Can be expensive
Indoor Composters
No backyard? No problem! Indoor composters are perfect for apartment dwellers. Options include bokashi buckets, electric composters, or small worm bins (vermicomposting). These systems are designed to work in small spaces without odors.
Pros:
- Fits in kitchens or balconies
- No outdoor access needed
- Some models produce compost very quickly
Cons:
- Limited capacity
- Bokashi systems require post-processing outdoors or in soil
- Some learning curve involved, especially with worm bins
Selecting the Right Compost System for You
The best composting system depends on your living situation, how much waste you produce, and how hands-on you want to be. Heres a quick comparison to help you decide:
| Compost Method | Best For | Main Features |
|---|---|---|
| Backyard Bin | Homes with yards & gardens | Large capacity, low-cost, slower process |
| Tumbler | Suburban homes & serious gardeners | Pest-resistant, faster breakdown, mid-size capacity |
| Bokashi Bucket | Apartments & indoor use | Anaerobic fermentation, handles meat/dairy, needs post-processing |
| Electric Composter | Tech-savvy urban dwellers | Fast processing time, compact, higher cost |
| Worm Bin (Vermicomposting) | Kitchens & classrooms | Sustainable, educational, produces rich compost tea and castings |
No matter which method you choose, setting up your compost system is the first step toward reducing waste and enriching your garden soil naturally.
4. Balancing Greens and Browns
One of the most important parts of successful composting is getting the right balance between “greens” and “browns.” These terms don’t refer to colors, but rather to the chemical makeup of your compost materials. Greens are rich in nitrogen, while browns are full of carbon. Together, they create the perfect environment for microbes to break everything down into rich, crumbly compost.
What Are Greens?
Greens are moist, soft materials that provide nitrogen—an essential nutrient that helps microorganisms grow and do their job in breaking down organic matter.
Common Green Materials:
- Fruit and vegetable scraps
- Coffee grounds and tea bags
- Fresh grass clippings
- Plant trimmings
What Are Browns?
Browns are dry, fibrous materials high in carbon. They help provide structure to your compost pile and prevent it from becoming too wet or smelly.
Common Brown Materials:
- Dried leaves
- Straw or hay
- Shredded newspaper or cardboard (non-glossy)
- Sawdust (from untreated wood)
The Ideal Ratio
A good rule of thumb is to aim for a ratio of about 2 to 3 parts browns for every 1 part green by volume. This doesn’t have to be exact, but keeping things balanced helps keep your compost pile healthy and odor-free.
| Material Type | Main Nutrient | Examples | How Much to Use |
|---|---|---|---|
| Greens | Nitrogen (N) | Vegetable scraps, coffee grounds, fresh grass clippings | 1 part |
| Browns | Carbon (C) | Dried leaves, shredded paper, straw | 2–3 parts |
Troubleshooting Tip:
If your compost pile smells bad or looks soggy, you probably have too many greens—add more browns. If it’s dry and decomposing slowly, toss in some greens or water to get it going again.
Quick Tip:
Chop or shred larger items before adding them to your bin—they’ll break down faster and help maintain a better mix of greens and browns.
A well-balanced compost pile not only breaks down faster but also results in nutrient-rich humus that’s perfect for improving your garden soil.
5. Maintaining and Troubleshooting Your Pile
Now that youve got your compost pile started, its time to keep it healthy and active. A little regular care goes a long way in speeding up decomposition and avoiding common problems like bad smells or unwanted critters. Heres how to stay on top of your compost game.
Turning the Pile
Turning your compost helps introduce oxygen, which is essential for the microbes that break down organic matter. Use a pitchfork or shovel to mix the pile every 1–2 weeks. This keeps things from getting compacted and helps distribute moisture and heat evenly.
How Often Should You Turn?
| Compost Type | Turning Frequency |
|---|---|
| Hot (active) composting | Every 1–2 weeks |
| Cold (passive) composting | Once a month or less |
Watering the Pile
Your compost should feel like a wrung-out sponge—moist but not soggy. If its too dry, decomposition slows down. Too wet, and you might get odors or slimy material. Water occasionally if youre in a dry climate or during hot summer months.
Quick Tip:
If you squeeze a handful of compost and no water comes out but it holds its shape, youre in good shape!
Troubleshooting Common Issues
Even well-tended piles can hit a few bumps along the way. Here’s how to handle the most common problems:
| Issue | Possible Cause | Solution |
|---|---|---|
| Bad odor (like rotten eggs) | Too much moisture or not enough air | Add dry browns like leaves or shredded paper and turn the pile |
| Pile not heating up | Lack of nitrogen or small pile size | Add greens like veggie scraps, grass clippings, and make sure pile is at least 3×3 feet |
| Pests (rats, raccoons) | Meat, dairy, or oily foods in pile | Avoid adding those items; use a secure bin with a lid if needed |
Keep It Balanced
A good compost pile has the right mix of “greens” (nitrogen-rich materials like fruit scraps and grass clippings) and “browns” (carbon-rich materials like dried leaves and cardboard). Aim for about 2–3 parts browns for every 1 part green. This balance keeps microbes happy and your pile smelling fresh.
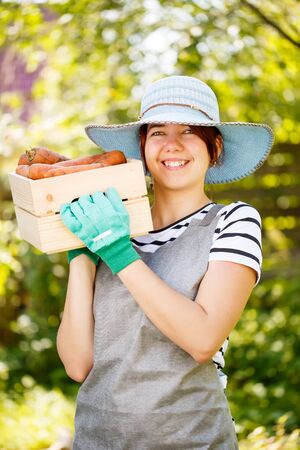
6. Using Finished Compost in Your Garden
Once your compost is ready, it’s time to put that “garden gold” to work! But first, how do you know when it’s finished? Finished compost should be dark brown or black, crumbly, and have an earthy smell—like fresh soil. It shouldnt look like the original materials you added.
How to Tell If Compost Is Ready
| Sign | Description |
|---|---|
| Color | Dark brown to black |
| Texture | Crumbly and soil-like |
| Smell | Earthy and pleasant (not sour or rotten) |
| Material Breakdown | No recognizable food scraps or yard waste remains |
Best Ways to Use Compost Around Your Yard
There are several ways to use finished compost depending on your gardening needs. Here are a few easy ideas:
Lawn Areas
Sift compost and spread a thin layer (about 1/4 inch) across your lawn in early spring or fall. Rake it in gently and water afterward. This helps improve soil structure and provides nutrients for strong grass growth.
Garden Beds
Mix 1–2 inches of compost into the top 6–8 inches of soil before planting vegetables or flowers. You can also add a layer of compost around existing plants as mulch to retain moisture and reduce weeds.
Potted Plants
Add compost to potting mix at a ratio of about 1 part compost to 2 parts potting soil. You can also sprinkle a small amount on top of the soil in containers as a slow-release fertilizer.
Compost Application Quick Guide
| Area | How Much to Use | When to Apply |
|---|---|---|
| Lawn | 1/4 inch layer | Spring or Fall |
| Garden Beds (New) | 1–2 inches mixed into soil | Before planting season |
| Around Existing Plants | 1–2 inch top layer as mulch | Anytime during growing season |
| Potted Plants | 1 part compost to 2 parts potting mix | During repotting or topdressing monthly |
No matter how you use it, compost adds life back into your soil. It feeds beneficial microbes, improves drainage, holds moisture, and gives plants a natural nutrient boost—all without synthetic fertilizers. Happy composting!