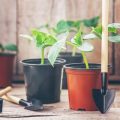
1. Choosing the Right Location
Before you start building your potting bench, one of the most important decisions youll make is where to put it. A well-chosen location can make your gardening tasks easier and more enjoyable. Here are a few key things to consider when picking the perfect spot in your yard or garden:
Sunlight Exposure
Look for a place that gets plenty of natural light, especially if you plan to use your potting bench for starting seeds or working with plants that need sunlight. However, avoid areas with intense afternoon sun that could cause tools or supplies to overheat.
Proximity to Water Sources
Your potting bench should be close to a water source like an outdoor faucet or hose. This makes it easier to water plants, clean tools, and wash off dirt without having to carry buckets of water across the yard.
Accessibility
You’ll want your potting bench to be easy to get to from both your garden beds and your house. Consider how often you’ll be using it and make sure it’s located along a convenient path. Think about whether youll need space for wheelbarrows or carts as well.
Quick Reference Guide: Location Factors
| Factor | Why It Matters | Tips |
|---|---|---|
| Sunlight | Helps with seed starting and plant maintenance | Avoid full afternoon sun if possible |
| Water Access | Makes watering and cleaning easier | Place near a hose or outdoor faucet |
| Accessibility | Saves time and effort during garden work | Choose a flat, reachable area close to garden beds |
Extra Tips
- If possible, position the bench under partial shade like a pergola or tree canopy for comfort during hot days.
- A sheltered spot can help protect your tools and supplies from rain and wind.
- Check for level ground—this will make building and using the bench much easier.
Taking the time to choose the right location now will save you from headaches later and help ensure your potting bench becomes a go-to spot for all your gardening projects.
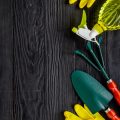
2. Selecting Durable Materials
When building a potting bench that will live outdoors, choosing the right materials is one of the most important steps. Your bench needs to handle different weather conditions like rain, sun, and maybe even snow. To make sure your project stands the test of time, it’s best to use materials that are known for their durability and weather resistance.
Cedar: Naturally Weather-Resistant Wood
Cedar is a popular choice for outdoor furniture because it naturally resists rot, moisture, and insects. It has a pleasant aroma and ages beautifully over time, turning into a soft gray if left untreated. While cedar is more expensive than some other woods, its long-lasting qualities make it worth the investment for many gardeners.
Treated Lumber: Budget-Friendly and Durable
If you’re looking for something more affordable, pressure-treated lumber is another good option. It’s treated with chemicals to resist decay and bugs. However, its important to note that this type of wood should not come into contact with food or be used in areas where you plan to grow edibles unless its sealed properly.
Galvanized Steel: Strong and Rust-Resistant
For those who want an industrial look or extra durability, galvanized steel is a great addition to your potting bench design. It won’t rust easily and can handle heavy wear and tear. You might use steel for shelves, work surfaces, or brackets to add strength and style.
Comparison of Common Materials
| Material | Weather Resistance | Maintenance | Cost | Best Use |
|---|---|---|---|---|
| Cedar | High | Low | Moderate to High | Main structure & shelving |
| Treated Lumber | High | Moderate (may require sealing) | Low to Moderate | Main structure (non-edible use) |
| Galvanized Steel | Very High | Low | Moderate | Shelves & hardware support |
Tip:
No matter which material you choose, make sure to seal or paint any exposed wood edges to prevent moisture damage over time. With the right materials in place, your potting bench will be ready to support all your garden projects for years to come.
![]()
3. Designing for Functionality and Comfort
When building a potting bench for your garden work, its important to design with both functionality and comfort in mind. A well-planned layout can make gardening tasks more enjoyable and efficient. Start by considering the height of your bench. A comfortable working height typically ranges between 36 to 40 inches, similar to a standard kitchen counter. This helps reduce back strain during extended periods of potting or transplanting.
Plan Your Workspace
Your workspace should be wide enough to accommodate pots, tools, soil containers, and other gardening essentials. Aim for at least 24 to 30 inches of depth and 36 inches or more in width. If you have more space, consider extending the surface to allow for multiple tasks or even a helper to work alongside you.
Maximize Storage Features
Efficient storage keeps your tools within reach and reduces clutter. Incorporate different types of storage solutions into your bench design:
| Storage Feature | Description |
|---|---|
| Shelves | Use open shelves above or below the work surface for storing pots, soil bags, and watering cans. |
| Drawers | Add drawers for smaller tools like pruners, gloves, seed packets, and plant labels. |
| Hooks & Pegboards | Install hooks or a pegboard on the back panel or sides to hang trowels, shears, and brushes. |
| Bins or Buckets | Add bins under the counter for compost or potting soil storage. |
Tip:
If you frequently use certain tools, place them on hooks right above your workspace so theyre always within arms reach.
Create a Comfortable Setup
A good setup includes not just functionality but also comfort. Make sure theres adequate lighting if your bench is indoors or in a shaded area—either natural light from nearby windows or install waterproof LED lights. Consider placing an anti-fatigue mat on the ground where youll stand most often. These small additions can make a big difference in how much you enjoy working at your potting bench.
4. Incorporating Storage Solutions
A functional potting bench isn’t just about having a sturdy surface to work on—it’s also about keeping everything you need close at hand. By adding smart storage solutions, you can keep your gardening area organized and efficient. Let’s take a look at some of the best ways to incorporate storage into your potting bench setup.
Built-in Shelves
Shelves are one of the easiest and most effective ways to store garden supplies. Install them above or below your work surface to hold items like small pots, watering cans, or bags of soil. Adjustable shelves offer flexibility as your storage needs change throughout the seasons.
Storage Bins
Plastic or wooden bins can help you separate and organize smaller items such as seed packets, gloves, plant markers, and ties. Label each bin for quick access and stack them neatly under the bench or on side shelves.
Pegboards for Tools
A pegboard mounted on the back or side of your potting bench is a great way to keep frequently used tools within arm’s reach. Use hooks to hang trowels, pruners, scissors, and even a small hand broom. You can customize the layout to fit your tool collection.
Common Storage Options and Their Uses
| Storage Option | Best For |
|---|---|
| Shelves | Larger items like soil bags, pots, watering cans |
| Bins | Small items such as gloves, seeds, plant labels |
| Pegboard | Hand tools including trowels, pruners, shears |
Tips for Keeping It All Organized
- Add clear labels to every bin and shelf section.
- Use waterproof containers if your bench is outdoors.
- Create zones—keep potting materials in one area and tools in another.
An organized potting bench not only saves time but also makes gardening more enjoyable. With everything in its place, you’ll spend less time searching for what you need and more time digging in the dirt.
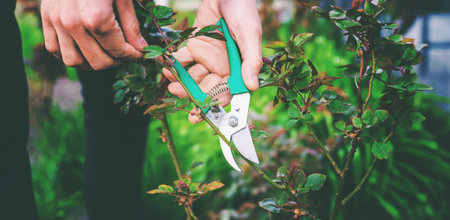
5. Building and Assembly Tips
Creating a sturdy, functional potting bench with storage is a rewarding DIY project. Follow these easy-to-understand steps to build your bench safely and accurately.
Step-by-Step Construction Guide
Step 1: Gather Your Tools and Materials
Make sure you have everything ready before starting. Heres a quick checklist:
| Tool | Purpose |
|---|---|
| Tape Measure | Measuring wood dimensions accurately |
| Circular Saw or Handsaw | Cutting boards to size |
| Cordless Drill & Bits | Drilling pilot holes and driving screws |
| Screwdriver | Tightening screws if needed manually |
| Sander or Sandpaper (120-150 grit) | Smoothing rough edges and surfaces |
| Clamps | Holding pieces in place during assembly |
| Safety Gear (gloves, goggles) | Protecting yourself during construction |
Step 2: Cut All Wood Pieces According to Plan
Use your tape measure and saw to cut the legs, shelves, back panel, and top surface according to your chosen dimensions. Double-check measurements before each cut to avoid mistakes.
Step 3: Assemble the Frame First
Create the basic rectangular frame using the side supports and legs. Use clamps to hold pieces in place, drill pilot holes, then drive in wood screws for a strong connection. Make sure everything stays level as you work.
Step 4: Attach the Work Surface and Shelves
Add the main top surface securely across the frame. Then attach lower shelves for storage. You can use corner brackets for added strength if needed.
Step 5: Install Back Panel and Optional Features
The back panel can be used for hanging tools—attach it with screws or nails. Consider adding hooks or small bins for extra organization.
Safety Precautions to Keep in Mind
- Wear safety glasses: Protect your eyes from dust and flying debris while cutting or drilling.
- Avoid loose clothing: It can get caught in power tools.
- Saw on a stable surface: Use sawhorses or a workbench when cutting wood.
- Lift properly: When moving heavy parts, bend your knees—not your back.
Troubleshooting Tips During Assembly
- If your bench wobbles, double-check that all legs are even. You may need to sand one down slightly or add shims.
- If screws split the wood, make sure youre drilling pilot holes first and not overtightening.
This guide helps ensure your potting bench is built safely, correctly, and ready to serve you through many gardening seasons ahead!
6. Maintaining Your Potting Bench Year-Round
Once youve built your functional potting bench with storage, its important to keep it in good shape all year long. Regular maintenance not only keeps your bench looking nice but also helps it last for many seasons of gardening. Here are some simple tips to help you protect your bench from seasonal wear and tear.
Seal the Wood to Prevent Damage
If your potting bench is made of wood, sealing it is one of the most important steps you can take. Sealing protects against moisture, UV rays, and temperature changes that can cause cracking or warping. Use an outdoor-rated wood sealant or weatherproofing stain, and reapply at least once a year—preferably in the spring before heavy use begins.
Recommended Sealants for Outdoor Use
| Product Name | Type | Best For |
|---|---|---|
| Thompsons WaterSeal | Clear Wood Protector | General outdoor use, water resistance |
| Minwax Helmsman | Spar Urethane | High UV exposure areas |
| DEFY Extreme Wood Stain | Water-based stain/sealer | Eco-conscious applications |
Clean Regularly to Avoid Build-Up
Dirt, spilled potting mix, and water stains can build up over time. Wipe down surfaces with a damp cloth weekly and do a deeper clean monthly using mild soap and water. Avoid harsh chemicals that might damage the finish or be harmful to plants.
Winterize Before Cold Weather Hits
If you live in an area with freezing winters, its crucial to winterize your potting bench:
- Empty drawers and storage bins: Remove tools, seeds, and anything that could be damaged by cold or moisture.
- Cover the bench: Use a waterproof tarp or custom-fit cover to keep snow and rain off.
- Move indoors if possible: If space allows, store your bench in a garage or shed during winter months.
Inspect Hardware and Joints Seasonally
Screws, hinges, and brackets can loosen over time due to temperature fluctuations and regular use. Check these parts every few months and tighten or replace them as needed. Applying a little oil to metal hardware can also prevent rust.
Quick Maintenance Checklist by Season
| Season | Main Tasks |
|---|---|
| Spring | Reseal wood, deep clean surfaces, check for winter damage |
| Summer | Wipe down weekly, inspect joints and hardware monthly |
| Fall | Clean thoroughly, empty storage, begin winterizing process |
| Winter | Store indoors if possible or cover well; check occasionally for moisture buildup under covers |
A little care goes a long way. By following these easy maintenance steps, you’ll keep your potting bench functional and beautiful no matter the season.