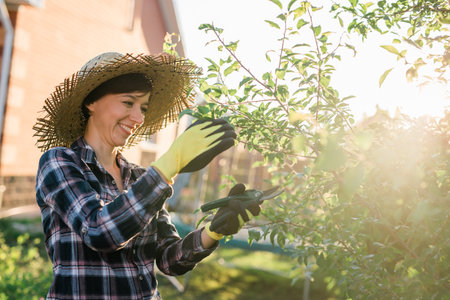
Introduction to Fall Harvest Preservation
As the crisp autumn air settles in and leaves begin to turn, American families across the country look forward to one of the season’s most cherished traditions: preserving the fall harvest. For generations, home gardeners and farmers alike have gathered their bounty—vibrant tomatoes, sweet apples, hearty squashes, and more—and set aside time to can, freeze, or dry these treasures. This tradition is about more than just saving food; it’s a way to celebrate the fruits of hard work, connect with family heritage, and ensure that the delicious flavors of the garden can be enjoyed all year long. By learning preservation techniques, households not only reduce waste but also create homemade foods that are healthier and often tastier than store-bought alternatives. Whether you’re new to gardening or a seasoned homesteader, embracing these time-honored methods brings warmth and flavor to your table even in the depths of winter.
Home Canning Essentials
If you’re serious about preserving your fall harvest, home canning is a tried-and-true American tradition that brings the flavors of autumn to your pantry shelves year-round. The key to safe and delicious canned goods is following trusted canning techniques and using the right equipment. Below, we’ll explore essential canning methods, must-have tools, and some practical tips for putting up your favorite fall produce.
Safe and Trusted Canning Techniques
There are two main canning methods used in American kitchens: water bath canning and pressure canning. Each method has its own best uses based on the acidity of the food you’re preserving.
| Canning Method | Best For | Key Notes |
|---|---|---|
| Water Bath Canning | High-acid foods (apples, peaches, tomatoes, pickles) | Simple method; submerges jars in boiling water |
| Pressure Canning | Low-acid foods (green beans, carrots, corn, meats) | Uses high pressure and temperature for safety |
Essential Equipment Checklist
- Canning Jars: Mason jars with new lids and clean bands.
- Water Bath or Pressure Canner: Depending on what you’re preserving.
- Jar Lifter: For safely moving hot jars.
- Lid Wand: Handy for retrieving sterilized lids from hot water.
- Funnel: Makes filling jars neat and easy.
- Ladle: Essential for transferring jams, jellies, or brine.
- Towels: For wiping jar rims and cushioning hot jars during cooling.
Canning Tips for Popular Fall Produce
The fall garden offers a bounty of fruits and veggies perfect for canning. Here are some time-tested tips for success:
- Pears & Apples: Peel and slice evenly; use as sauces, pie fillings, or preserves.
- Pumpkins & Squash: Only pressure can in cubes—not pureed—for safety.
- Cranberries: Make tart relishes or classic cranberry sauce; ideal for water bath canning.
- Tomatoes: Always add lemon juice or citric acid to ensure safe acidity levels before water bath canning.
- Green Beans & Carrots: Must be pressure canned due to low acidity.
Your Family’s Flavor, Your Way
The beauty of home canning is making recipes your family will love. Stick with tested recipes from reliable sources like the USDA or Ball Blue Book to guarantee safety. Don’t forget to label each jar with the date and contents—your future self will thank you when pulling out homemade applesauce or dilly beans on a chilly winter night!

3. Freezing Your Autumn Produce
Freezing is one of the simplest and most effective ways to preserve your fall harvest, locking in freshness and nutrients with minimal fuss. Before you toss those farm-fresh apples, green beans, or butternut squash into the freezer, let’s walk through the best methods for ensuring peak flavor and texture all winter long.
Step-by-Step Freezing Methods
Start by washing and thoroughly drying your produce. Most vegetables, like carrots, broccoli, and corn, benefit from blanching—a quick dip in boiling water followed by an ice bath—which helps preserve color, flavor, and nutritional value. For fruits such as berries or sliced peaches, lay them out on a baking sheet to freeze individually before transferring to bags; this keeps them from sticking together.
Maintaining Quality
Always use freezer-safe bags or containers, squeezing out as much air as possible to prevent freezer burn. Label everything with the date and contents—you’ll thank yourself later! Try to keep your freezer at 0°F (-18°C) or below for optimal storage. Remember that some items, like leafy greens or potatoes, may change texture after freezing but are still excellent for soups or casseroles.
Organizing Your Freezer for Easy Access
A little planning goes a long way when it comes to freezer organization. Group similar items together—think “soups & stews,” “smoothie fruits,” or “veggies for roasting.” Use stackable bins or baskets so nothing gets lost in the back. Keep a simple inventory list taped to the freezer door; it’ll help you rotate older items forward and cut down on waste.
With these strategies in place, you can enjoy the tastes of fall straight from your garden (or local farmer’s market) all year round—without any last-minute scrambles at dinnertime.
4. Drying Techniques for Long-Term Storage
Drying is one of the oldest and most effective ways to preserve your fall harvest, especially for fruits, vegetables, and herbs. Whether you’re aiming to keep those beautiful apple slices crisp for snacking or want a pantry full of flavorful dried basil and oregano, understanding both traditional and modern drying methods can help you make the most of your autumn bounty. Let’s explore some popular techniques and find out which works best for different kinds of produce.
Traditional Air-Drying
Air-drying is a time-honored method that requires little more than patience and proper airflow. This technique is ideal for herbs such as thyme, rosemary, sage, and mint. Simply tie small bunches together with kitchen twine and hang them upside down in a dry, well-ventilated spot out of direct sunlight. Within one to two weeks, your herbs should be perfectly crisp and ready for storage in airtight containers.
Oven-Drying
If you’re short on time or want to dry larger quantities, oven-drying is a reliable option. Spread thinly sliced apples, tomatoes, or even peppers on baking sheets lined with parchment paper. Set your oven to its lowest temperature (usually around 140-170°F), prop the door open slightly to allow moisture to escape, and check every hour until your produce feels leathery or brittle. Oven-drying speeds up the process and works well for many types of fruit and veggies.
Modern Electric Dehydrators
For those who plan to dry food regularly, investing in an electric dehydrator makes sense. These appliances offer consistent low heat and airflow, resulting in evenly dried produce with minimal effort. They are especially handy for bulk drying apples, pears, berries, and even jerky.
Comparison Table: Drying Methods
| Method | Best For | Time Required | Pros | Cons |
|---|---|---|---|---|
| Air-Drying | Herbs, flowers | 1-2 weeks | No energy use; easy setup | Takes time; needs proper environment |
| Oven-Drying | Fruits, veggies | 4-12 hours | Quick; uses common kitchen tools | Uses electricity; risk of over-drying |
| Dehydrator | Berries, apples, jerky | 6-24 hours (varies) | Even results; large batches possible | Requires purchase; uses power outlet |
Tips for Successful Drying:
- Select only high-quality produce—blemishes can impact flavor and shelf life.
- Slice fruits and vegetables evenly so they dry at the same rate.
- Store dried goods in airtight jars or vacuum-sealed bags away from light and humidity.
- If in doubt about dryness, bend a piece—if it snaps cleanly or crumbles, it’s ready!
No matter which method you choose, drying helps capture the essence of fall flavors and makes it easy to add a touch of homegrown goodness to your meals all year long.
5. Creative Ways to Use Preserved Foods
After all the hard work of canning, freezing, and drying your fall harvest, it’s time for the fun part—enjoying those preserved flavors in your everyday meals! Whether you’re reaching for a jar of home-canned tomatoes or a bag of frozen peaches, there are so many delicious ways to bring that autumn goodness to your table.
Cozy Fall Stews and Soups
Nothing says comfort like a steaming bowl of stew on a crisp evening. Your canned tomatoes, green beans, and dried herbs make an unbeatable base for hearty soups and stews. Try adding frozen corn or peas for extra sweetness and color. These simple ingredients come together quickly, filling your kitchen with warmth and memories of harvest days.
Homemade Apple Crisps and Baked Goods
If you took the time to preserve apples—whether sliced and frozen or turned into applesauce—you’ve got the makings of classic American desserts at your fingertips. Bake up an apple crisp topped with oat crumble for a family treat, or stir homemade applesauce into muffins and pancakes for a wholesome breakfast twist. Your homegrown fruit adds unbeatable flavor and nostalgia to every bite.
Healthy Snacks Straight from the Pantry
Dried fruits like pears, peaches, or berries are perfect for snacking on the go—toss them in lunchboxes, trail mixes, or even sprinkle them over yogurt. Dehydrated veggies like kale chips or tomato leather also make satisfying snacks that kids and adults love. Preserving lets you skip store-bought options and enjoy real food with no mystery ingredients.
Everyday Inspiration for Family Meals
The real joy of preserving is how it inspires creativity in the kitchen. Mix your canned pickles into potato salad, blend frozen pumpkin into smoothies, or top a pizza with your dried tomatoes. Even on busy weeknights, these preserved goodies turn simple meals into something special—and remind us that good food starts right at home.
6. Storing and Labeling for Success
Once your fall bounty is preserved, proper storage and labeling are essential to protect your hard work and ensure that your food stays safe and delicious all year long. Let’s break down the best practices for keeping your home-canned, frozen, and dried goods at their peak.
Choose the Right Storage Conditions
Store canned foods in a cool, dark, and dry place—think basement shelves or pantry cabinets away from heat sources. Aim for a steady temperature between 50°F and 70°F. For frozen produce, keep everything at 0°F or below in a chest freezer or reliable upright freezer. Dried foods should be kept in airtight containers placed in a dark cupboard or pantry to prevent moisture and sunlight from spoiling your efforts.
Label Everything Clearly
Don’t trust your memory—labels are a must! Use waterproof markers or adhesive labels to note what’s inside each jar or bag and the date it was processed. Include details like “Spiced Apple Butter – Sept 2024” or “Green Beans – Frozen Oct 2024.” This helps you track freshness and makes meal planning easier.
Date and Rotate Your Stock
The golden rule: first in, first out (FIFO). Place new jars, bags, or containers behind older ones so you use up last year’s harvest first. Regularly check your stash for any signs of spoilage or forgotten items. By rotating your stock, you minimize waste and always enjoy produce at its best quality.
Check for Signs of Spoilage
Before using any preserved food, give it a quick inspection. Look for bulging lids on canned jars, ice crystals on frozen goods (which could signal thawing), or unusual smells or colors in dried foods. When in doubt, throw it out—it’s not worth risking your health.
Involve the Family
Get everyone involved in the process! Assign labeling duties to kids or make checking expiration dates a monthly family activity. Not only does this teach valuable skills, but it also ensures nothing gets overlooked in the back of the pantry or freezer.
By following these simple storage and labeling habits, you can savor the flavors of fall well into the next year while reducing food waste and making mealtime a breeze. Happy preserving!