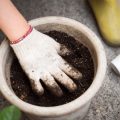
Gather Your Supplies
Before you even think about lifting your houseplant from its pot, take a moment to gather all the right tools for a smooth, stress-free repotting session. Having everything ready will help you stay organized and keep your plant’s roots calm and happy. First up, choose a new pot that’s just one or two inches wider than the current one—too big can lead to soggy soil and root rot. Make sure the pot has good drainage holes. Next, pick up some fresh, high-quality potting mix designed for your specific type of plant; cactus soil is different from what a fern loves! Don’t forget a sturdy pair of gardening gloves to protect your hands and keep things clean. Grab a small trowel or scoop for moving soil, and keep some old newspapers or a tarp handy to catch any mess. A watering can with a gentle spout is also essential for giving your plant a drink after the move. Having all these supplies ready before you start makes the whole process easier on both you and your leafy friend.
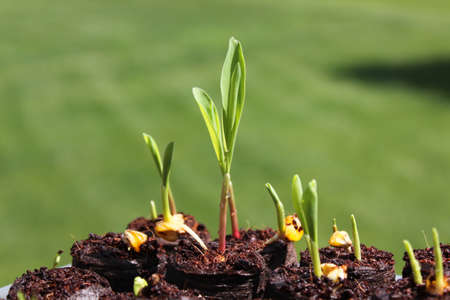
2. Pick the Right Time
Repotting your houseplants at the right moment makes all the difference when it comes to minimizing root damage and plant stress. Timing is everything—choose a period when your plant is naturally primed for growth, which usually means avoiding the dormant months and focusing on active growing seasons. For most common houseplants in US homes, this sweet spot falls in spring or early summer, when longer days and warmer temperatures encourage new roots and leaves.
Why Timing Matters
Plants go through cycles: periods of rest (dormancy) and periods of active growth. Repotting during dormancy—typically late fall through winter—can shock your plant and slow its recovery. On the flip side, repotting while its actively growing helps the plant bounce back faster because it’s already using energy to produce new roots and foliage.
General Guidelines by Plant Type
| Plant Type | Best Time to Repot | Notes |
|---|---|---|
| Tropical Houseplants (e.g., Pothos, Monstera) | Spring to Early Summer | Most active growth; recovers quickly from root disturbance |
| Cacti & Succulents | Late Spring | When soil dries faster and plants are less prone to rot |
| Flowering Houseplants (e.g., African Violets) | After Flowering Period Ends | Avoid repotting during bud or bloom stage |
| Ferns & Shade-Loving Plants | Early Spring | Before frond production ramps up |
Pro Tip:
If you see roots poking out of the drainage holes, soil drying out super fast, or stunted growth even with regular care, those are all signs your plant might need a new home—regardless of the season. But whenever possible, wait until early spring for a smoother transition.
3. Prep Your Plant and Pot
Step 1: Remove the Plant Carefully
Begin by gently tipping your plant sideways and supporting the base with your hand. Tap the bottom and sides of the pot to loosen the root ball—be patient, don’t yank! If your houseplant is stubborn, run a butter knife around the inner edge to help release it. This minimizes root damage and helps avoid stressing your green friend.
Step 2: Clean and Inspect the Roots
Shake off excess soil from the roots, then use your fingers to gently tease apart any tangled or circling roots. If you spot mushy, blackened, or rotten roots, snip them away with clean scissors. Don’t wash all the soil off; leaving some familiar soil helps your plant adjust faster to its new home.
Step 3: Prepare the New Pot
Select a pot that’s just one size larger than the old one—too much space can stress your plant. Make sure it has a drainage hole to prevent soggy roots. Place a layer of fresh, well-draining potting mix at the bottom. For larger pots, add a coffee filter or mesh over the hole to keep soil from escaping but still allow water to drain.
Quick Tip:
If you’re reusing an old pot, scrub it with soap and hot water first to remove any lingering pests or diseases that could harm your plant during this big move.
Ready for Repotting?
Your houseplant and new pot are prepped for a healthy transition! Next up: getting your plant settled in its fresh home without missing a beat.
4. Handle Roots with Care
When repotting your houseplants, root handling is a crucial step that can make or break the plant’s health. Most popular American houseplants—like pothos, snake plants, spider plants, and peace lilies—are pretty forgiving, but their roots still need gentle care. Here’s how to detangle and trim roots without causing unnecessary damage:
Detangling Roots: Step-by-Step
- Remove the Plant Gently: Support the base of the plant and tip the pot sideways or upside down. Tap the pot if needed—don’t yank!
- Loosen the Root Ball: Use your fingers or a chopstick to gently tease apart circling or tangled roots. For thick clusters (common in pothos or spider plants), work slowly from the outside in.
- Untangle Carefully: Try to keep as much of the root mass intact as possible, especially fine feeder roots on plants like ferns or peace lilies.
Trimming Roots: When and How
If you see dead, mushy, or excessively long roots circling the root ball, it’s time for some trimming. Always use clean, sharp scissors or pruners to avoid introducing disease.
| Plant Type | Root Trait | Trimming Advice |
|---|---|---|
| Pothos | Thick & fast-growing | Trim circling or brown roots; leave healthy white ones |
| Snake Plant | Tough & wiry | Cut away rotten or blackened sections only |
| Spider Plant | Bushy, fibrous clumps | Slight thinning okay if overcrowded; avoid major cuts |
| Peace Lily | Dense & fleshy | Snip off dead/soft roots; keep moist during process |
Troubleshooting Common Issues
- If roots are severely compacted, soak them in lukewarm water for 5-10 minutes to soften before teasing apart.
- If you accidentally break a root, don’t panic! As long as most are intact, your plant will recover—just be extra gentle moving forward.
Pro Tip:
Avoid leaving roots exposed to air for too long—especially in dry climates. Keep them covered with a damp cloth while you prep the new pot. By taking your time and handling roots with care, you’ll set your houseplant up for a thriving future in its new home.
5. Settle Your Plant In
Now comes the most satisfying part—helping your houseplant feel at home in its new pot. Start by gently placing your plant in the center of the pot, making sure the root ball sits about an inch below the rim. This gives you space to add water later without spillage. Hold the plant steady with one hand and begin filling in around it with fresh, high-quality potting mix using your other hand or a small scoop. Use a soil blend appropriate for your plant type—think well-draining cactus mix for succulents, or moisture-retentive blends for tropicals.
As you fill, lightly tamp down the soil with your fingers (but don’t pack it too tightly) to eliminate air pockets that can dry out roots. Check that your plant is standing upright and at the same depth it was growing before. If it starts to lean or sink, adjust by adding or removing soil beneath the root ball until you’re happy with its position.
After filling, give the pot a gentle tap on the table to help the soil settle naturally around the roots. Add more mix if needed, but always leave that inch of headspace at the top for watering. Finally, ensure your plant feels snug—not squeezed—in its new home. You want it secure enough to stay put but not so tight that roots can’t expand as they grow.
Once everything looks just right, water thoroughly until you see moisture coming out of the drainage holes. This helps settle the soil further and wakes up those roots to start exploring their new space. Place your repotted plant in a spot with proper light and let it adjust before resuming regular care routines.
6. Aftercare and Recovery
Repotting is a big change for your houseplant, so proper aftercare is key to help it settle into its new home without unnecessary stress. Here’s how you can support your plant’s recovery and encourage healthy growth:
Watering: Less Is More
Right after repotting, resist the urge to water heavily. Most houseplants do best if you let the soil dry out slightly before watering. This gives any minor root injuries time to heal and prevents root rot. For most plants, wait until the top inch of soil feels dry before giving a gentle, thorough watering.
Light Adjustments
Your freshly repotted plant will appreciate indirect light while it recovers. Avoid placing it in direct sunlight right away, as this can add extra stress. If your plant was in a bright spot before, move it to an area with filtered light for a week or two, then gradually reintroduce brighter conditions.
Monitor for Stress Signs
Keep an eye out for yellowing leaves, wilting, or drooping—these are common signs of transplant shock. Don’t panic! Most plants bounce back with a little patience and care. Hold off on fertilizing for at least a month; too much food now can overwhelm stressed roots.
Encourage Healthy Recovery
- Mist leaves occasionally to boost humidity, especially for tropical varieties.
- Avoid moving or disturbing the plant further during the first few weeks.
- Remove dead or damaged leaves to prevent disease and help your plant focus energy on new growth.
A Little Patience Goes a Long Way
Repotting isn’t just about new soil—it’s about giving your houseplant room to thrive. With thoughtful aftercare, you’ll help your green friend overcome the initial shock and start growing strong again in its new pot. Trust the process and enjoy watching your plant settle in!