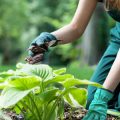
1. Remove Spent Plants and Weeds
As the growing season winds down, one of the most important steps in fall garden cleanup is removing any plants that are dead, diseased, or have already finished producing. Leaving these in your garden over winter can invite a host of problems when spring rolls around. Dead plant matter not only clutters your garden beds but also provides a cozy hiding place for pests and harmful pathogens to survive the cold months.
Why This Step Matters
Pests like aphids, squash bugs, and spider mites can overwinter in plant debris and soil if its not cleared out properly. Fungal diseases such as powdery mildew or blight can linger on infected plant material and reappear next season. Removing these threats now helps protect your gardens health and boosts productivity next year.
What to Remove
| Type of Plant Material | Action | Reason |
|---|---|---|
| Dead annuals (e.g., tomatoes, beans) | Pull up and compost if disease-free | Prevents pest and disease carryover |
| Diseased plants (e.g., mildewed cucumbers) | Dispose in trash, not compost | Avoid spreading pathogens |
| Persistent weeds (e.g., crabgrass, bindweed) | Uproot completely, roots and all | Prevents regrowth in spring |
| Spent vegetable plants | Remove and compost healthy ones | Keeps soil clean and ready for next planting |
Pro Tip:
If youre unsure whether a plant is diseased, its safer to dispose of it rather than risk contaminating your compost pile. Also, be sure to shake off excess soil before discarding plant material to preserve soil nutrients.
Taking the time now to clear out old vegetation and aggressive weeds sets your garden up for a healthier start next season. Its a simple task with big rewards come springtime.
2. Clean and Store Garden Tools
Taking care of your garden tools at the end of the fall season helps ensure they’re ready to go when spring rolls around. Dirty, dull, or rusty tools not only make gardening harder but can also spread plant diseases. A little effort now can save you time and money later.
Why Cleaning Matters
Soil, sap, and plant debris left on tools can harbor pests and diseases over winter. By thoroughly cleaning your tools before storing them, you reduce the risk of carrying those problems into next season’s garden.
Steps to Properly Clean Your Garden Tools
| Step | Description |
|---|---|
| 1. Remove Dirt and Debris | Use a stiff brush or putty knife to scrub off soil and plant material from blades, handles, and hinges. |
| 2. Wash with Soapy Water | Fill a bucket with warm water and mild dish soap; wash each tool to remove any remaining grime. |
| 3. Disinfect | Dip tools in a solution of 1 part bleach to 9 parts water, or use rubbing alcohol to kill lingering bacteria or fungi. |
| 4. Dry Thoroughly | Lay tools out on a towel or hang them up to air dry completely before moving on to sharpening or oiling. |
Sharpening and Oiling for Longevity
Dull blades can damage plants by making ragged cuts. Use a sharpening stone or file to restore sharp edges on pruners, shears, and shovels. Once sharpened, apply a light coat of oil—such as vegetable oil or machine oil—to metal surfaces to prevent rust. Wooden handles can be rubbed with linseed oil to keep them from drying out and cracking.
Recommended Oils for Tool Maintenance
| Tool Part | Type of Oil |
|---|---|
| Metal Blades | Machine oil, WD-40, or vegetable oil (for eco-friendly option) |
| Wooden Handles | Boiled linseed oil |
Storage Tips for Winter
Once your tools are clean, dry, and oiled, store them in a dry place like a garage, shed, or basement. Hanging them on a pegboard or placing them in a toolbox helps keep them organized and protected from moisture. Avoid leaving tools on the ground where they can rust or become damaged over the winter months.
A Quick Checklist Before Storing Tools:
- ✔ All dirt removed?
- ✔ Blades disinfected?
- ✔ Edges sharpened?
- ✔ Metal parts oiled?
- ✔ Stored in a dry location?
A little maintenance goes a long way. Clean tools last longer, work better, and help keep your garden healthy year after year.

3. Amend and Cover Your Soil
After clearing out old plants and debris, it’s time to give your soil some love before winter sets in. Healthy soil is the foundation of a productive garden, and fall is the perfect season to improve it.
Add Nutrients with Compost or Manure
Start by spreading a generous layer of compost or well-rotted manure over your garden beds. These organic materials feed the beneficial microbes in your soil and help improve texture, drainage, and fertility. Don’t worry about mixing it in—let nature do the work over winter as the nutrients slowly seep into the ground.
Benefits of Adding Organic Matter:
| Material | Benefits |
|---|---|
| Compost | Improves soil structure, adds nutrients, boosts microbial activity |
| Well-Rotted Manure | Provides nitrogen, improves moisture retention, enhances fertility |
Protect with Mulch or Cover Crops
Once youve added compost or manure, cover your soil to protect it through the colder months. Mulching helps prevent erosion, suppresses weeds, and keeps soil temperatures more stable. Use organic mulches like shredded leaves, straw, or wood chips for best results.
If you want to go a step further, plant cover crops such as clover, rye, or winter wheat. These “green manures” not only shield your soil but also add nutrients when tilled under in spring.
Mulch vs. Cover Crops:
| Option | Main Purpose | Best For |
|---|---|---|
| Mulch | Insulation and weed control | Small beds or perennial gardens |
| Cover Crops | Nutrient boost and erosion prevention | Larger vegetable plots or raised beds |
A little effort now will pay off big next spring with healthier soil and fewer weeds to deal with.
4. Inspect and Maintain Garden Infrastructure
Fall is the perfect time to check on your gardens structural elements and make sure everything is ready for next spring. Cold weather, snow, and rain can take a toll on garden infrastructure, so addressing any issues now will save you time and effort later.
Check Raised Beds
Inspect wooden raised beds for signs of rot, loose boards, or protruding nails. If the wood is deteriorating, consider replacing damaged sections or reinforcing them with corner brackets. Tighten any screws or nails that may have come loose during the growing season.
Examine Trellises and Supports
Trellises, cages, and plant supports should be sturdy enough to handle winter weather. Look for rusted metal parts, broken wooden slats, or bent wires. Repair or replace damaged parts so they’re ready to go when its time to plant climbing veggies like peas or tomatoes in spring.
Inspect Fences
Garden fences help keep out pests like rabbits and deer. Walk around your fence line to check for holes, weak spots, or leaning posts. Patch up any gaps and reinforce wobbly sections to maintain protection throughout the off-season.
Test Irrigation Systems
If you use a drip irrigation system or sprinklers, fall is a great time to flush out lines and check for leaks or blockages. Drain water from hoses and systems to prevent freezing damage over winter. Make necessary repairs now so you won’t have to troubleshoot when planting season arrives.
Fall Infrastructure Maintenance Checklist
| Item | What to Check | Action Needed |
|---|---|---|
| Raised Beds | Loose boards, rot, protruding nails | Tighten fasteners, replace damaged wood |
| Trellises/Supports | Bent frames, rusted metal, broken parts | Repair or replace as needed |
| Fences | Gaps, weak posts, animal damage | Patch holes, reinforce structure |
| Irrigation System | Leaks, clogs, water left inside | Flush lines, drain water, fix leaks |
Taking care of these details now means youll start the next growing season with a garden that’s safe, organized, and ready to thrive.
5. Plan for Next Season
Fall is the perfect time to reflect on your gardens performance over the past season. Take a moment to think about which plants thrived and which ones struggled. Maybe your tomatoes produced more than you could handle, but your cucumbers didn’t do so well. These observations are key to planning a better, more productive garden next year.
Review What Worked and What Didn’t
Start by making a simple list or chart of successes and challenges from this season. This will help you decide what crops to repeat, rotate, or replace.
| Crop | Success? | Notes |
|---|---|---|
| Tomatoes | Yes | High yield, great flavor. Try same variety next year. |
| Cucumbers | No | Poor fruit set, possible pest issues. Consider moving location or trying a new variety. |
| Carrots | Somewhat | Decent crop, but soil may need more loosening or compost. |
Plan Crop Rotation
Crop rotation helps reduce soil-borne diseases and pest buildup. Avoid planting the same family of plants in the same spot year after year. Rotate between groups like legumes (beans, peas), nightshades (tomatoes, peppers), brassicas (cabbage, broccoli), and root crops (carrots, beets).
Example Rotation Plan:
| Bed | This Year’s Crop | Next Year’s Crop |
|---|---|---|
| 1 | Tomatoes (Nightshade) | Bush Beans (Legume) |
| 2 | Lettuce (Leafy Green) | Carrots (Root Crop) |
| 3 | Cabbage (Brassica) | Zucchini (Squash) |
Order Seeds Early
Fall is also a good time to start browsing seed catalogs or websites. Popular varieties can sell out quickly in spring, so get ahead by ordering seeds now for the crops you’ve decided to grow again—or try something new based on what didn’t work this year.
Consider Layout Changes
If certain parts of your garden got too much shade or had drainage issues, consider adjusting your layout. Maybe its time to add raised beds, expand your growing space, or install drip irrigation for better water efficiency.
Quick Tips:
- Sketch a rough garden plan for next year using this years notes.
- Add compost or mulch now to improve soil over winter.
- Label saved seeds clearly with date and variety.