1. What Is Composting and Why It Matters
Composting is a natural process that turns organic materials like food scraps, leaves, and grass clippings into nutrient-rich soil, often called “black gold” by gardeners. Its a simple yet powerful way to recycle waste from your kitchen and yard while boosting the health of your garden soil.
How Composting Works: The Science Behind It
At its core, composting is all about decomposition. Microorganisms—like bacteria and fungi—break down organic matter in the presence of oxygen. These microbes need four key ingredients to thrive:
- Greens: Nitrogen-rich items like vegetable scraps, coffee grounds, and grass clippings
- Browns: Carbon-rich materials such as dry leaves, cardboard, and newspaper
- Water: Moisture keeps the compost pile active but not soggy
- Air: Oxygen helps speed up the breakdown process and prevents bad odors
When these elements are balanced correctly, they create heat as part of the decomposition process. This heat helps kill off weed seeds and harmful pathogens, leaving behind clean, fertile compost.
Why Composting Matters for American Households
In the United States, a significant portion of household waste is made up of food scraps and yard debris. According to the EPA, over 30% of what we throw away could be composted instead. Composting at home reduces landfill waste, cuts down on methane emissions (a potent greenhouse gas), and supports healthier gardens without synthetic fertilizers.
Benefits of Composting at Home
| Benefit | Description |
|---|---|
| Improves Soil Health | Adds essential nutrients back into the soil, enhancing plant growth |
| Reduces Waste | Keeps food scraps and yard waste out of landfills |
| Lowers Greenhouse Gases | Cuts methane emissions produced by decomposing waste in landfills |
| Saves Money | Reduces the need for store-bought fertilizers and soil amendments |
| Supports Local Ecosystems | Encourages beneficial insects and microorganisms in your garden |
The Bottom Line on Starting Composting at Home
You don’t need fancy equipment or a big backyard to start composting. Whether youre in a suburban neighborhood or managing a small urban garden, composting is an easy habit that makes a big difference—for your garden and for the environment.
2. Types of Composting Methods for Home Gardeners
When it comes to composting at home, there’s no one-size-fits-all method. Your choice will depend on your available space, local climate, and how much time you want to invest. Here are some of the most popular composting methods used by backyard gardeners across the United States.
Backyard Bin Composting
This is the most traditional and widely used composting method. It involves collecting kitchen scraps and yard waste in a simple bin or pile in your backyard. Over time, with regular turning and the right balance of greens (nitrogen-rich materials) and browns (carbon-rich materials), these scraps break down into rich, dark compost.
Pros:
- Low cost and easy to set up
- Handles a large volume of organic waste
- Perfect for moderate to large yards
Cons:
- Takes longer to decompose (usually 6 months to a year)
- Might attract pests if not managed properly
- Requires regular maintenance like turning and moisture control
Vermicomposting (Worm Composting)
This method uses red wiggler worms to break down food scraps quickly and efficiently. Its great for small spaces and even works indoors.
Pros:
- Fast decomposition (as little as 2-3 months)
- No outdoor space required
- Produces nutrient-rich worm castings, ideal for garden soil
Cons:
- Sensitive to temperature extremes—worms prefer 55°F to 77°F
- You’ll need to monitor moisture and feed them regularly
- Might not handle large volumes of waste well
Tumbler Composting
Tumblers are enclosed bins mounted on a frame that allow you to spin or “tumble” the contents, speeding up the composting process through better aeration.
Pros:
- Easier turning and mixing of materials
- Pest-resistant due to enclosed design
- Faster results than traditional bins—often within 2-3 months
Cons:
- Larger models can be expensive
- Lesser capacity compared to open bins
- Might dry out faster in hot climates—requires moisture monitoring
Selecting the Right Method Based on Climate and Space
| Composting Method | Best For | Climate Suitability | Space Requirement |
|---|---|---|---|
| Backyard Bin Composting | Larger gardens, year-round use with cover | Mild to warm climates; can be adapted with insulation in cold areas | Adequate outdoor space needed |
| Vermicomposting | Apartments or homes with limited outdoor space | IIndoor-friendly; avoid extreme temperatures | Takes up minimal indoor or shaded outdoor space |
| Tumbler Composting | Pest-prone areas or those wanting quick results | Suits most climates; may need shade in hot regions | Midsize outdoor area required for rotation space |
No matter which method you choose, composting helps improve your gardens soil health by adding organic matter, improving drainage, and supporting beneficial microbial life. Whether youre growing tomatoes in raised beds or nurturing flower borders, theres a composting style that fits your lifestyle and environment.
3. How Compost Improves Backyard Soil Structure and Fertility
Adding compost to your backyard garden is one of the easiest and most effective ways to improve soil health and support plant growth. Whether youre working with clay, sandy, or loamy soil—common soil types across the U.S.—compost helps transform your garden into a thriving, fertile space. Heres how compost makes such a big impact:
Boosts Soil Structure
Good soil structure means that soil particles clump together in a way that allows air, water, and roots to move easily. Compost naturally binds soil particles into loose clusters, creating a crumbly texture thats perfect for planting. For heavy clay soils common in the Midwest or Southeast, compost helps break up dense clumps. In sandy soils often found in coastal areas, compost adds body and prevents rapid drainage.
Improves Water Retention
If you’re tired of watering your garden constantly, compost can help. It acts like a sponge, holding moisture in the soil longer so plant roots have consistent access to water. This is especially helpful during hot American summers when drought conditions can stress plants.
Water Retention Comparison
| Soil Type | Without Compost | With Compost |
|---|---|---|
| Sandy Soil | Poor water retention | Moderate to good water retention |
| Clay Soil | Slow drainage, waterlogged | Balanced moisture levels |
| Loamy Soil | Adequate retention | Improved efficiency and consistency |
Enhances Aeration
Your plants’ roots need oxygen just as much as they need water and nutrients. Compost helps keep the soil loose and airy, preventing compaction. This improved aeration allows roots to spread more easily and encourages healthy microbial activity underground.
Encourages Beneficial Microorganisms
Healthy soil is full of life. Compost introduces millions of beneficial microbes—like bacteria and fungi—that help break down organic material and release nutrients plants can absorb. These microbes also help suppress harmful pathogens, naturally protecting your garden from disease.
Main Benefits of Soil Microbes from Compost:
- Nutrient cycling: Helps convert organic matter into plant-available nutrients.
- Disease resistance: Competes with harmful organisms to protect roots.
- Root health: Supports stronger root systems for better growth.
No matter where you live or what type of backyard soil you have, composting can make a big difference in the overall health of your garden. From improving structure and water use to encouraging microscopic allies, compost truly sets the stage for a thriving outdoor space.
4. Using Compost to Boost Garden Plant Health
Once your compost is ready, its time to put it to work in your backyard. Whether youre growing flowers, vegetables, or simply maintaining a lush lawn, compost can significantly improve plant health and soil structure when used the right way.
Top-Dressing Your Lawn
Compost is excellent for top-dressing lawns. This means spreading a thin layer of compost directly over your grass. It helps improve soil texture, adds nutrients, and encourages healthy root growth without smothering your turf. Heres how to do it:
- Mow your lawn to a regular height before applying compost.
- Sift the compost to remove large chunks.
- Use a shovel or broadcast spreader to evenly distribute about 1/4 inch of compost across the lawn.
- Rake lightly to help the compost settle into the grass and soil.
- Water the lawn after application to help activate the nutrients.
Mixing Into Flower Beds
Flower beds thrive when mixed with nutrient-rich compost. It improves drainage, feeds the plants naturally, and encourages strong blooms. Follow these simple steps:
- Before planting, mix 2–3 inches of compost into the top 6–8 inches of soil.
- If flowers are already planted, apply a 1-inch layer of compost around the base of each plant as a mulch.
- This helps retain moisture and slowly releases nutrients over time.
Supporting Vegetable Gardens
Your veggie patch will thank you for using compost. Vegetables are heavy feeders and need rich soil to produce well. Compost provides a steady supply of nutrients without chemical fertilizers. Here’s how to use it effectively:
| Application Area | How Much Compost to Use | When to Apply |
|---|---|---|
| Before Planting | 2–4 inches mixed into topsoil | Early spring or fall |
| Around Growing Plants | 1-inch layer as mulch | Mid-season or during dry spells |
| After Harvest | Add compost and turn into soil | Late summer or fall cleanup |
The Power of Humus-Rich Soil
The humus in compost — that dark, crumbly material full of organic goodness — is what transforms average dirt into fertile garden soil. It holds moisture better, supports beneficial microbes, and makes nutrients more available to plants. With regular compost use, youll notice stronger stems, greener leaves, and higher yields in everything from tomatoes to tulips.
Tips for Best Results:
- Avoid using unfinished compost as it may rob nitrogen from plants.
- Don’t pile compost too close to plant stems; leave some breathing room.
- Reapply once or twice per season depending on your climate and garden needs.
By learning how to apply compost effectively across your yard, you’re not just feeding your plants — you’re building healthier soil that continues giving back year after year.
5. Common Composting Mistakes and How to Avoid Them
Composting is a fantastic way to enrich your backyard soil and boost garden health, but many American gardeners run into common pitfalls that can slow down or even ruin the process. The good news? Most of these mistakes are easy to fix once you know what to look for.
Improper Green-to-Brown Ratios
One of the biggest mistakes is not balancing “greens” (nitrogen-rich materials like fruit scraps and grass clippings) with “browns” (carbon-rich materials like dry leaves and cardboard). Too many greens can make your compost pile smelly and soggy, while too many browns slow down decomposition.
Ideal Green-to-Brown Ratio
| Material Type | Examples | Ratio Goal |
|---|---|---|
| Greens (Nitrogen) | Vegetable scraps, coffee grounds, grass clippings | 1 part |
| Browns (Carbon) | Dried leaves, shredded paper, straw | 2-3 parts |
Quick Fix: If your pile smells bad or looks slimy, add more browns. If it seems dry and inactive, mix in more greens.
Lack of Aeration
Your compost pile needs oxygen to break down properly. Without enough air, it becomes anaerobic—leading to foul odors and slower decomposition.
How to Keep It Airy
- Turn the pile: Use a pitchfork or compost aerator every 1-2 weeks.
- Avoid compacting: Don’t let heavy items weigh down your pile.
- Add bulky browns: Materials like twigs or shredded cardboard help create airflow.
Quick Fix: If your compost smells like rotten eggs, its time to aerate it by turning the pile and adding some dry brown material.
Addition of Wrong Materials
Certain items should never go into your compost bin, as they attract pests or introduce harmful bacteria.
Avoid These Items
| Avoid Composting | Why It’s a Problem |
|---|---|
| Dairy products & meat | Pest attraction and odor issues |
| Treated wood or glossy paper | Chemical contamination |
| Synthetic fabrics or plastic | Non-biodegradable waste |
Quick Fix: Stick to natural, plant-based kitchen scraps and yard waste. When in doubt, leave it out!
Poor Moisture Management
Your compost should feel like a wrung-out sponge—moist but not soggy. Too much water leads to rot; too little slows microbial activity.
Troubleshooting Moisture Levels
- If too wet: Add more browns like newspaper or sawdust.
- If too dry: Sprinkle with water as you turn the pile.
Quick Tip: Covering your pile with a tarp during rainy seasons can help regulate moisture levels.
Lack of Patience or Consistency
A healthy compost pile takes time—usually 2-6 months depending on conditions. Some gardeners give up too soon or forget about their piles altogether.
- Create a routine: Mark your calendar for regular turning and checks.
- Add variety: Mix in different types of greens and browns for better breakdown.
Nurturing your compost consistently pays off with rich, earthy humus that feeds your backyard soil and fuels garden growth naturally. Avoiding these common mistakes makes the entire process smoother—and much more rewarding!
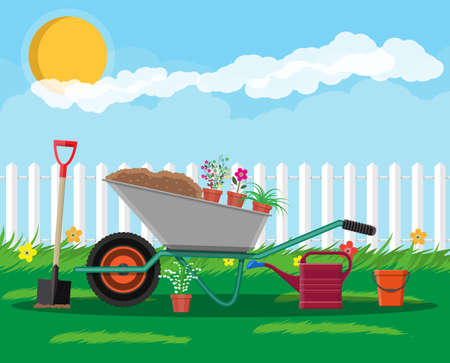
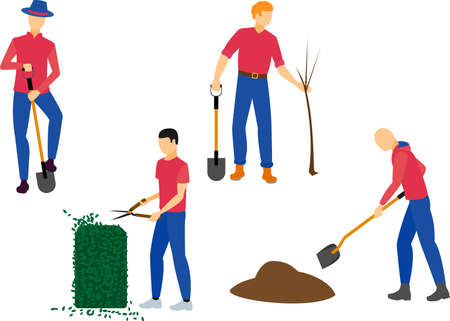
6. Getting Started: A Composting Action Plan for Your Backyard
Starting a compost pile in your backyard is easier than you might think, and it doesn’t take much to get going. With the right tools, materials, and a little bit of know-how, you’ll be turning kitchen scraps and yard waste into nutrient-rich soil in no time. Heres a simple action plan tailored for American homeowners looking to boost their garden health with composting.
Step 1: Gather Your Composting Tools
You don’t need fancy equipment, but having the right tools can make composting more efficient and enjoyable.
| Tool | Purpose |
|---|---|
| Compost Bin or Pile Area | Holds your compost; can be a store-bought bin or DIY corner in your yard |
| Pitchfork or Garden Fork | Helps turn and aerate your compost |
| Shovel | Useful for adding materials or removing finished compost |
| Kitchen Scrap Container | A small pail or bucket for collecting food scraps indoors |
| Thermometer (optional) | Monitors internal temperature of compost pile for optimal breakdown |
Step 2: Know What to Compost
A healthy compost pile needs a balance of “greens” (nitrogen-rich materials) and “browns” (carbon-rich materials).
| Browns (Carbon) | Greens (Nitrogen) |
|---|---|
| Dried leaves, straw, cardboard, newspaper, wood chips | Fruit & veggie scraps, coffee grounds, grass clippings, eggshells |
Avoid Composting:
- Dairy products and meat (attract pests)
Step 3: Build Your Pile
Create alternating layers of browns and greens to maintain balance. A good rule of thumb is 2-3 parts brown to 1 part green. Water each layer lightly as you build it to keep the pile moist but not soggy—think sponge damp.
Step 4: Maintain Your Compost Pile
The key to successful composting is regular maintenance. Here’s what to do weekly:
- Turn the pile with a pitchfork to add oxygen and speed up decomposition.
- Add new material as it becomes available—remember to balance greens and browns.
Step 5: Understand the Timeline
Your compost will typically be ready in 2–6 months depending on conditions like temperature, material size, and how often you turn it. Finished compost looks dark, crumbly, and smells earthy.
Quick Timeline Overview:
| Timeframe | What’s Happening? |
|---|---|
| Week 1–4 | Bacteria break down greens/browns; heat builds up inside the pile. |
| Month 2–3 | Pile cools slightly as decomposition continues; turn regularly. |
| Month 4–6+ | Pile matures into usable compost; screen if needed before applying to garden. |
Tips for Long-Term Success
- Chop large items like melon rinds or corn cobs into smaller pieces before adding them in.
This simple plan can help you kickstart your backyard composting journey while improving soil health and reducing household waste—all from your own backyard!