1. Introduction to Home Composting
Composting at home is a simple and rewarding way to recycle your organic waste while doing something great for the environment. Many American households are embracing composting as part of a more sustainable lifestyle, and it’s easy to see why. By turning food scraps and yard clippings into nutrient-rich soil, you reduce the amount of trash that ends up in landfills and support healthier gardens.
Why Composting Matters
Every year, the average U.S. household throws away hundreds of pounds of food and yard waste. Instead of sending this waste to landfills where it generates harmful methane gas, composting turns it into valuable material that can improve your garden soil, reduce the need for chemical fertilizers, and help retain moisture in your plants.
Benefits of Home Composting
| Benefit | Description |
|---|---|
| Reduces Household Waste | Diverts kitchen scraps and yard trimmings from your trash can, helping to lower landfill contributions. |
| Improves Soil Health | Adds essential nutrients to your garden, boosting plant growth and soil structure. |
| Saves Money | Cuts down on the need for store-bought fertilizer or soil conditioners. |
| Lowers Carbon Footprint | Reduces methane emissions from landfills and minimizes transportation-related pollution. |
A Sustainable Practice Gaining Popularity
Across America, more people are choosing to compost not just because its good for their gardens, but because its good for the planet. Whether youre living in a suburban home with a backyard or an apartment with limited space, there are DIY compost bin options that fit every lifestyle. From wooden pallet bins to compact countertop systems, creating your own compost bin is easier than you think—and well show you how in this series.
Common Items You Can Compost at Home
- Fruit and vegetable scraps
- Coffee grounds and filters
- Tea bags (without synthetic materials)
- Eggshells
- Grass clippings and leaves
- Shredded newspaper or cardboard (in moderation)
Quick Tip:
A good compost pile needs a balance of “greens” (wet items like food scraps) and “browns” (dry items like leaves or paper). Keep the mix balanced for best results!
In the next section, we’ll guide you through choosing the right type of DIY compost bin project that fits your space and lifestyle.
2. Choosing the Right Location and Materials
Setting up a successful DIY compost bin starts with picking the best spot and using the right materials. Whether youre working with a backyard, balcony, or small patio, choosing a good location and sourcing eco-friendly materials will make your composting process more efficient and sustainable.
Best Locations for Your Compost Bin
Where you place your compost bin matters. A well-chosen location helps speed up decomposition and keeps odors under control. Here are some ideal spots:
| Location | Why It Works |
|---|---|
| Backyard Corner | A shady area away from direct sunlight keeps compost moist but not too wet. |
| Near Garden Beds | Makes it easy to transfer finished compost directly to your plants. |
| Garage or Shed (for indoor bins) | Keeps bins protected from extreme weather; great for vermicomposting setups. |
| Balcony or Patio (Urban Areas) | Perfect for small-scale composting with compact bins or worm bins. |
Locally Available and Eco-Friendly Materials
You don’t need fancy equipment to build a compost bin. Many DIYers across the U.S. use simple, affordable, and recycled materials that are easy to find at local hardware stores or even in your own garage.
Common Materials Used in DIY Compost Projects
| Material | Description | Why Its Great |
|---|---|---|
| Wood Pallets | Often free from local stores or warehouses. | Sturdy and breathable; ideal for larger outdoor bins. |
| Plastic Storage Bins | Easily found at big-box retailers like Home Depot or Walmart. | Great for small-scale or indoor composting; drill holes for ventilation. |
| Wire Mesh or Hardware Cloth | Sourced from garden centers or hardware stores. | Good for building open-air bins that allow airflow while keeping pests out. |
| 5-Gallon Buckets | Repurposed food-grade buckets from restaurants or delis. | Compact solution for kitchen scraps; ideal for apartment dwellers. |
Tips for Choosing Materials Wisely
- Avoid treated wood: Pressure-treated wood may contain chemicals that can leach into your compost.
- Use recycled items when possible: Repurposing old containers reduces waste and saves money.
- Add ventilation: Drill holes or include gaps in your bin design to keep air circulating—oxygen is key to healthy composting!
Selecting the right location and materials is one of the first—and most important—steps in building a successful DIY compost system. With a little planning, youll be well on your way to turning kitchen scraps and yard waste into rich, garden-ready compost right in your own home or backyard.

3. Simple DIY Compost Bin Ideas
Creating your own compost bin at home doesn’t have to be complicated or expensive. Whether you have a spacious backyard, a small patio, or live in an apartment, there are easy and effective compost bin options that suit your lifestyle. Below are some beginner-friendly DIY compost bin ideas using materials you may already have or can easily find at local hardware stores.
Pallet Compost Bin
Pallet bins are ideal for those with backyard space and a lot of yard waste. They’re sturdy, breathable, and can be assembled quickly.
Materials Needed:
- 4 wooden pallets (same size)
- Zip ties, nails, or screws
- Optional: hinges for access door
Instructions:
- Stand three pallets upright to form a U-shape.
- Secure them together using zip ties or screws.
- Add the fourth pallet as a front gate—either fixed or attached with hinges for easy access.
Trash Can Composter
This is perfect for patios or small outdoor spaces. It’s also great for those just starting out with composting.
Materials Needed:
- Plastic trash can with lid (32-gallon works well)
- Drill with 1/4-inch bit
Instructions:
- Drill holes all around the trash can—including the bottom and sides—for aeration and drainage.
- Add organic waste like fruit peels, coffee grounds, and dry leaves.
- Secure the lid and roll the can every few days to mix contents.
Wooden Crate Setup
If you’re in an apartment with a balcony or small patio, wooden crates offer a compact and stylish composting solution.
Materials Needed:
- One or two wooden crates (wine crates work well)
- Burlap sack or landscape fabric
- Staple gun
Instructions:
- Line the inside of the crate with burlap or fabric to retain contents while allowing airflow.
- Add alternating layers of green (wet) and brown (dry) organic materials.
- Aerate regularly by stirring with a small hand rake or stick.
Comparison Table: DIY Compost Bin Options
| Bin Type | Best For | Main Materials | Space Required |
|---|---|---|---|
| Pallet Bin | Larger backyards | Wooden pallets, screws/zip ties | High |
| Trash Can Composter | Patios & beginners | Plastic trash can, drill | Medium |
| Wooden Crate Setup | Apartments & balconies | Wooden crate, fabric lining | Low |
No matter your space or experience level, building your own compost bin can be simple and rewarding. Choose the design that works best for your home environment and start turning organic waste into nutrient-rich compost today!
4. How to Maintain and Troubleshoot Your Compost Bin
Keeping your DIY compost bin running smoothly is key to effective organic waste recycling. Whether youre using a simple plastic tote or a wooden pallet setup, regular maintenance helps ensure your compost breaks down properly without unpleasant surprises. Heres how to keep everything on track.
Balancing Green and Brown Materials
A healthy compost pile needs the right mix of “greens” (nitrogen-rich materials) and “browns” (carbon-rich materials). Too much of one or the other can cause problems like odor or slow decomposition. A good rule of thumb is about 2 to 3 parts browns for every 1 part green.
| Greens (Nitrogen) | Browns (Carbon) |
|---|---|
| Fruit and veggie scraps | Dried leaves |
| Coffee grounds | Shredded newspaper |
| Grass clippings | Sawdust (untreated wood) |
| Tea bags (non-plastic) | Cardboard (no glossy print) |
Moisture Control
Your compost should feel like a wrung-out sponge — moist but not soaking wet. If it’s too dry, materials won’t break down efficiently. If it’s too wet, it can start to smell bad. Add water during dry spells or more browns if things get soggy.
Quick Moisture Fixes
- Too Wet: Mix in dry leaves, shredded paper, or straw.
- Too Dry: Add a little water while turning the pile or include wetter greens like fruit scraps.
Aeration: Let It Breathe
Compost needs air to break down properly. Without oxygen, your pile can turn anaerobic, leading to foul smells. Turn your pile with a pitchfork or compost aerator once a week to keep air circulating and speed up decomposition.
Troubleshooting Common Compost Issues
If your compost isnt behaving as expected, dont worry — most problems are easy to fix. Here’s a guide to help you troubleshoot:
| Issue | Possible Cause | How to Fix It |
|---|---|---|
| Bad Odor (like rotten eggs) | Too much moisture or not enough air | Add browns, turn the pile for better airflow |
| Pests like flies or rodents | Food scraps exposed or wrong items added | Bury food scraps under browns; avoid meat/dairy/oily foods |
| Pile not breaking down | Lack of nitrogen or moisture, poor aeration | Add more greens or water; turn the pile more often |
| Pile too hot or steaming excessively | Too much nitrogen or large size pile | Add browns and turn the pile to release heat |
Regular Maintenance Tips
- Chop larger items before adding them to speed up breakdown.
- Keep your bin covered if possible to control rainwater and retain warmth.
- Monitor temperature by touch — warm is good, but extremely hot may mean imbalance.
- Track what you add for better balance over time.
A well-maintained compost bin not only reduces your household waste but also gives you rich, earthy compost perfect for gardens, flower beds, or houseplants. With just a little attention each week, your DIY compost project will stay efficient and hassle-free.
5. Using Finished Compost in Your Garden
Once your compost is fully decomposed, it becomes a rich, dark, earthy-smelling material that’s ready to be used in your garden. But how do you know when its ready? And what are the best ways to use it? Let’s walk through the basics of identifying finished compost and some common, effective ways to put it to work in your yard—just like many home gardeners across the U.S. do.
How to Tell When Your Compost Is Ready
Finished compost should no longer look like the original food scraps or yard waste you added. It should be crumbly, dark brown or black, and have a pleasant, earthy smell—kind of like forest soil. If you still see large chunks of food or the pile smells sour or rotten, give it more time to break down. Depending on your composting method and weather conditions, this can take anywhere from 2 months to a year.
Checklist: Signs of Finished Compost
| Characteristic | Ready? |
|---|---|
| Dark brown or black color | ✔ |
| Crumbly texture | ✔ |
| Pleasant earthy smell | ✔ |
| No visible food scraps or leaves | ✔ |
| No foul odor | ✔ |
Ways to Use Finished Compost Around Your Yard
Now that your compost is ready, you can use it almost anywhere in your outdoor space. Here are some popular applications that match common gardening practices in the U.S.:
Lawn Top-Dressing
Sift your compost and spread a thin layer (about 1/4 inch) over your lawn in early spring or fall. This helps improve soil health and promotes lush, green grass growth.
Vegetable Gardens
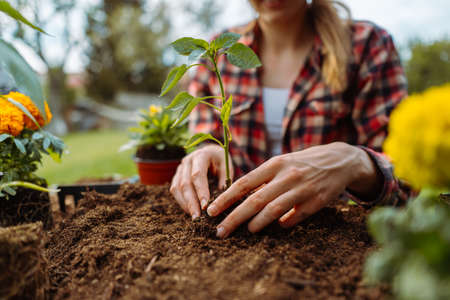
Mix compost into your garden beds before planting vegetables. A good rule of thumb is to add 1–2 inches of compost and mix it into the top 6 inches of soil. You can also side-dress established plants during the growing season for an extra nutrient boost.
Flower Beds and Borders
Add compost around perennials, shrubs, and annuals as a slow-release fertilizer. It improves moisture retention and encourages healthy root development.
Mulch Substitute
You can use coarse or unfinished compost as mulch around trees and shrubs. Spread it about 2–3 inches thick but keep it away from direct contact with stems or trunks to avoid rot.
Tip: Store Extra Compost for Later Use
If you have more compost than you can immediately use, store it in a covered bin or plastic bag in a dry area. This keeps it from drying out too much or getting soggy from rain—and youll have nutrient-rich material ready whenever you need it!


